AutoCorrect in Microsoft Word is a feature that automatically corrects common typing mistakes and resolves words as you type. This is a feature designed to improve accuracy and efficiency during document writing, so you don’t have to manually correct errors.
Word automatically detects and corrects some common typing errors, such as upside-down letters or missed letters, so the text is more consistent and correct.
AutoCorrect automatically suggests words you might want to type based on previous posts. This feature helps save time because you can quickly receive suggestions and continue typing.
In addition to autocorrect and word completion, AutoCorrect can also be set to correct words or phrases that you frequently mistype. You can add custom words or acronyms that you want to fix automatically as you type them.
You can set AutoCorrect preferences to your liking. You can enable or disable the autocorrect or word completion feature, as well as add special entries to the AutoCorrect list to get the results you want.
AutoCorrect entries in Microsoft Word are static. In simpler terms, you tell Word what errors to look for and what to replace. When Word finds such errors in your text, it automatically converts them to the correct text.
Sometimes, you may want dynamic text. For example, you want to display the author’s name, date, title, file name, and others. You can easily make settings in AutoCorrect to do so.
How to Create AutoCorrect Dynamic Entries in Word
In the following example, you create an AutoCorrect dynamic entry that displays the current date. That is, AutoCorrect will always display the date when you created it.
- Open a Microsoft Word document.
- Then select the “Insert” tab. In the “Text” group, click “Quick Parts” and select the “Field” option.
- In the “Field” dialog box, select “Date” in the “Field names” section.
- Next, in the “Field properties” section, select the date format you want to use.
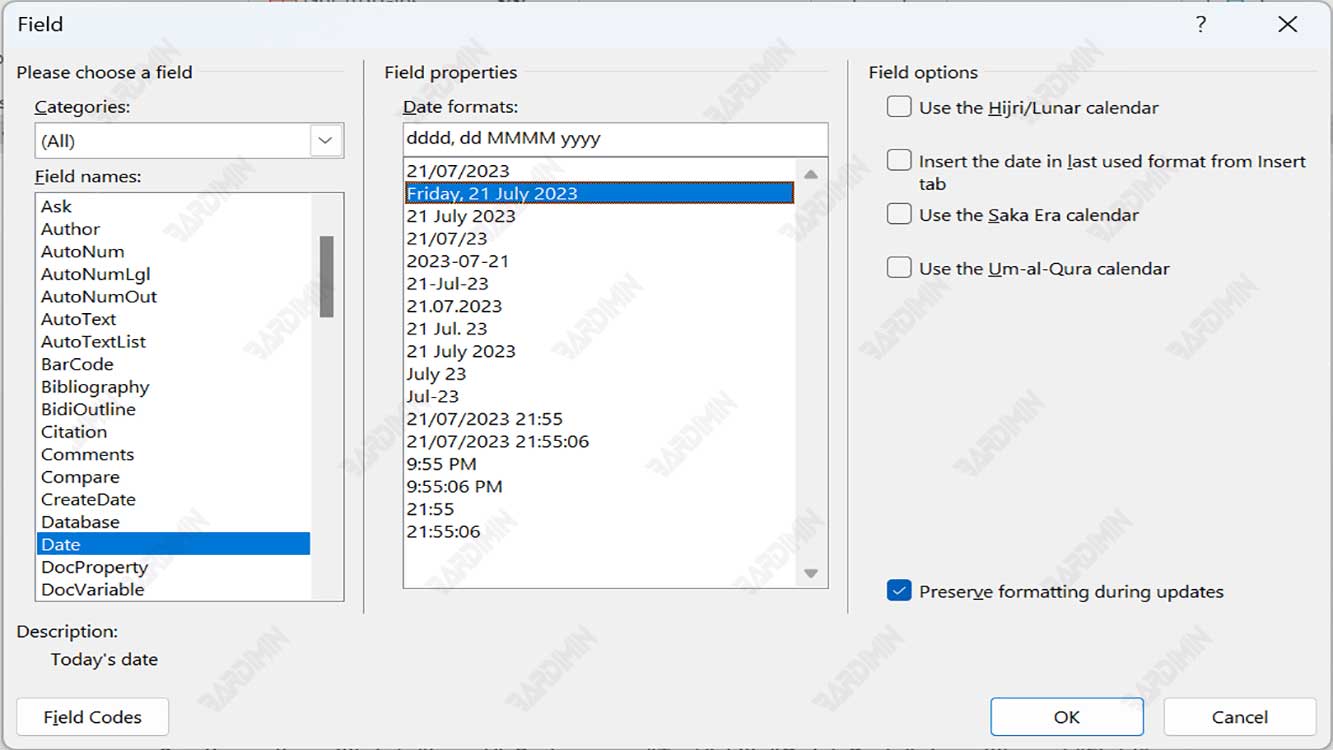
- Click the OK button and Word will display the current date on the document.
- Then select the entire date field.
- Next, click “File > Options > Proofing”.

- Click “AutoCorrect Options” to open a dialog box.
- In the Replace text box, type an abbreviation or short code (for example, “mydate”).
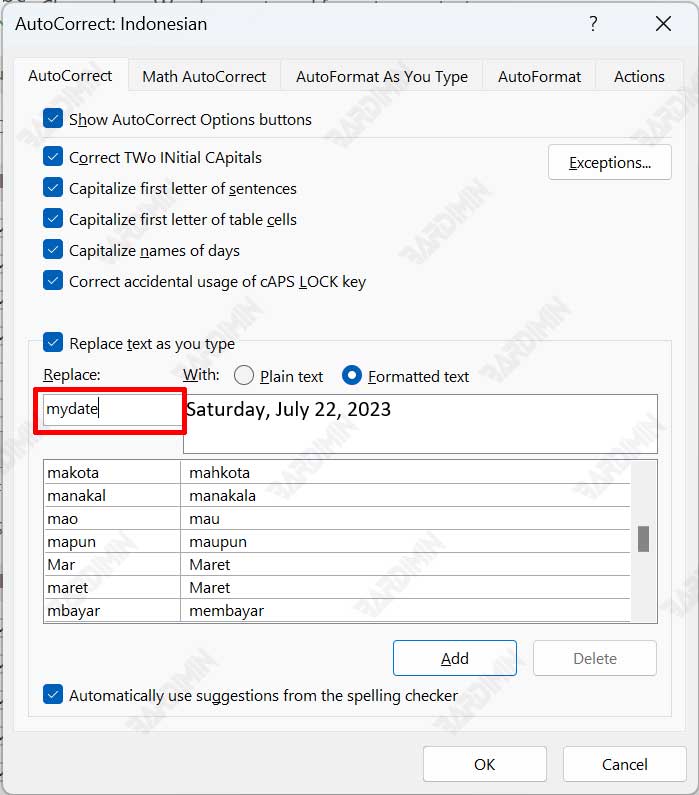
- Then, click the “Add” button.
- Click the OK button, and then click OK again in the Word Options dialog box.
You can use the same steps to create a dynamic AutoCorrect entry that includes the author’s name, any information about the document, file name, file size, and current time. To make the best AutoCorrect suggestions, include a Field field as part of the correction text. In this situation, when you want to add AutoCorrect text, Word displays a box in which you can type the information you need.