Do you need to type or insert an arrow symbol in a Microsoft Word document? Word has provided several options for users to do this.
When typing a document in Word, sometimes you need to apply visual symbols, such as arrows with different shapes and directions, to make the writing more intuitive and vivid. Like when you want to create a flowchart or point to anything.

Arrows are useful symbols for conveying information faster than usual. By using arrow symbols, you don’t have to type extensive explanations.
Word, interestingly, lets you create any arrow you choose. Straight, curved, or double-sided arrows all work.
Arrow symbols cannot be written directly like numbers and letters, but it is not difficult to type arrows in Microsoft Word. The application has provided several options for users to complete this operation.
There are several methods for inserting arrows in Word, each of which is quite basic and common. Arrows can be added using shapes, codes, or keyboard shortcuts. In this article, Bardimin will show you how to quickly and easily add an arrow symbol to your Word document.
How to type and insert arrow symbols in a Word document
There are several commonly used methods to type arrow symbols in Word documents. You can type arrow symbols using:
- AutoCorrect
- Symbol
- Shape
Other Interesting Articles
1] Use the AutoCorrect feature to type arrow symbols in Word
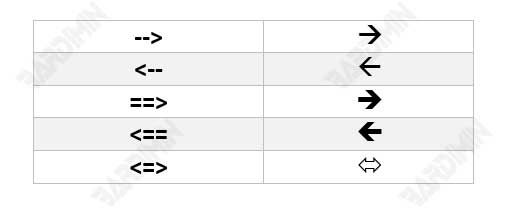
Using AutoCorrect shortcuts is one of the fastest methods to type arrows in Word. Word will automatically convert a certain sequence of characters to arrows if you insert them.
- Create a Microsoft Word document or open an existing document.
- Place the mouse cursor where you want to insert the arrow symbol.
- Enter the appropriate combination of characters to create an arrow.

If you don’t want the text to be converted to an arrow symbol, press the Backspace key on your keyboard or Undo (CTRL+Z) to change the arrow back to the symbol you entered.
You can also add another arrow symbol to the “File > Option > Proofing > AutoCorrect options“.
2] Using the Insert Symbol feature to insert arrow symbols in Word
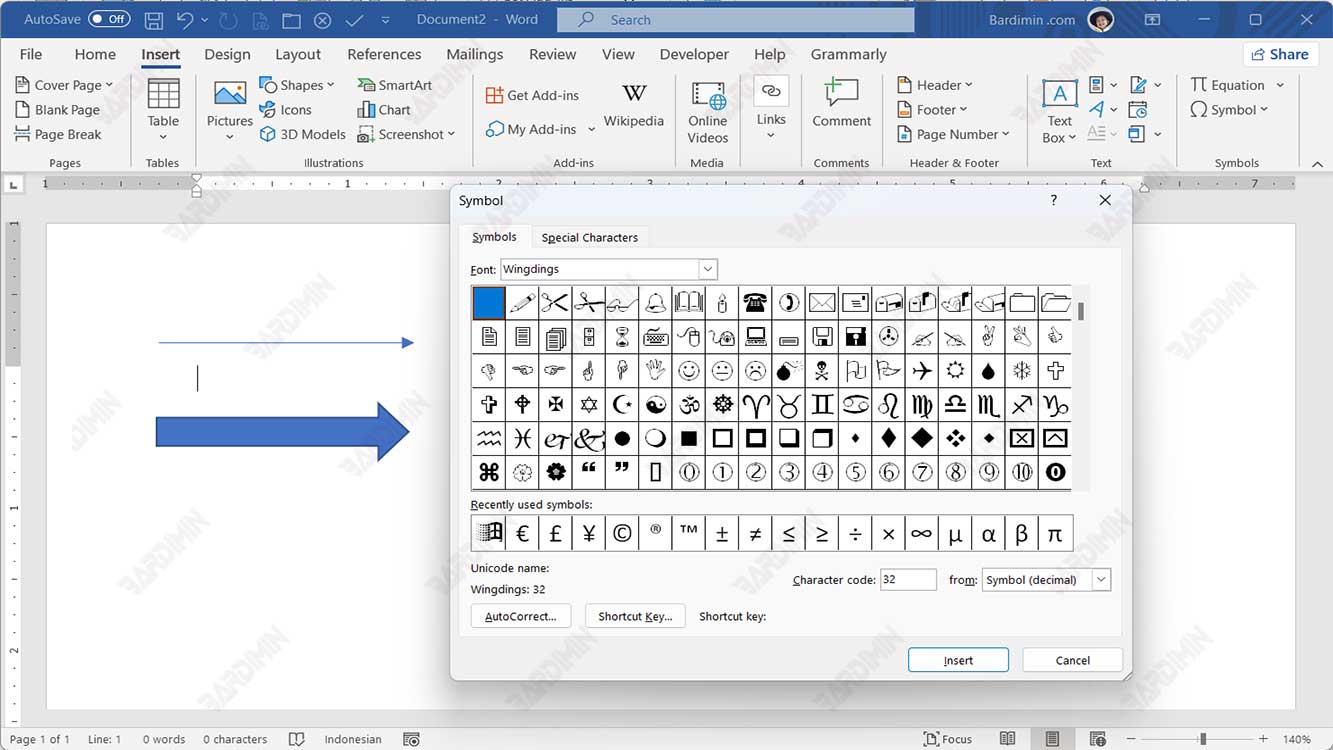
If you want to insert an arrow symbol that is not in the default AutoCorrect, you can insert an alternative arrow symbol through the “Insert a symbol” menu. This gives you more options, including up and down arrows, as well as left and right arrows.

- Create a new Microsoft Word document or open an existing document.
- Place the mouse cursor where you want to insert the arrow symbol.
- Click the “Insert” tab, then click the “Symbol” button and select “More symbols“.
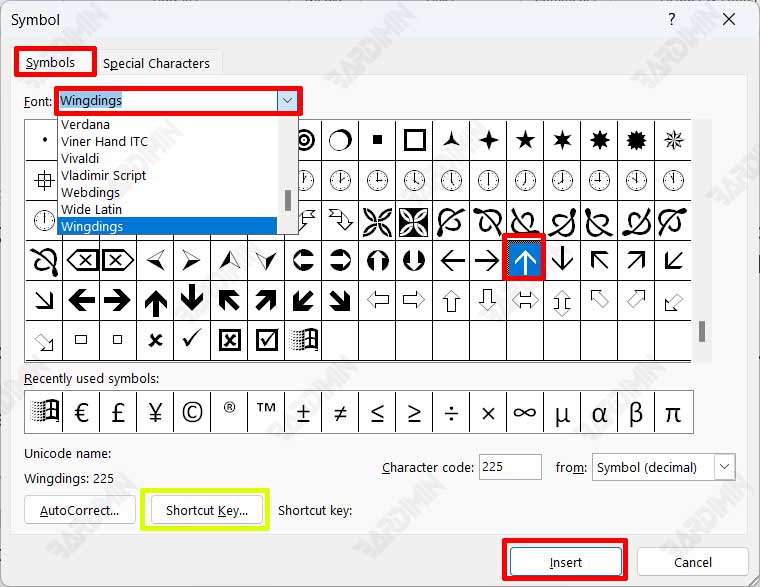
- In the dialog box that opens, select the “Symbols” tab.
- Select the “Wingdings” or “Symbol” font on the font field dropdown button. Each font has a different arrow symbol style.
- Search and select the arrow symbol you want.
- Click the “Insert” button to insert.
You can add keyboard shortcuts to specific arrow symbols that you use frequently by clicking the “Shortcut key” button.
3] Using the Shapes feature to create an arrow symbol in Word
- Add an arrow to the Word document to which you want to add an arrow.
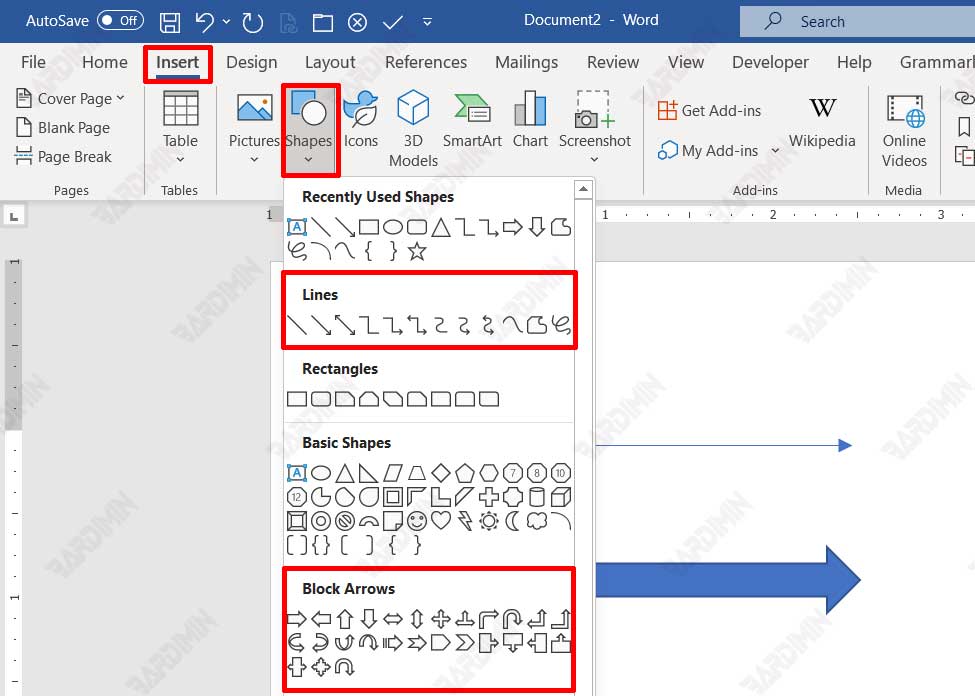
- Click the “Insert” tab, then click the “Shapes” button.
- In the options that appear, select the arrow style you need. You can use simple arrows, double-sided or curved arrows in the “Lines” section. If you want solid arrows, you can use the arrows in the “Block Arrows” section.
- After you select the desired arrow style, the pointer icon will replace your mouse pointer. Now, hold down the mouse button and draw an arrow on the desired area or picture in the document. Release the mouse button to complete the arrow.

To draw an arrow straight or at a specific angle, hold down the Shift key while drawing the arrow.
