The indicator light of the Epson XP-15000 printer suddenly flashed incessantly, followed by an error message that made the heart flutter. That’s a sign: the waste ink counter in your printer is full. But this is not the end of everything. There’s a solution that only experienced technicians know about, an Adjustment Program Epson XP-15000 that can “revive” your printer in minutes.
This is not just a regular download place. This is a complete guide that will help you understand the secrets behind this Service Tool. We’ll walk you through step by step, from how to download safely, to understanding its hidden features, to using the tool responsibly. This is the key to freeing your Epson XP-15000 printer from the annoying “error” state.
Adjustment Program, also known as a Service Tool or Resetter, is a specialized software that works directly on the internal system of the Epson XP-15000 printer. It is a “master key” that opens access to hidden functions that are not available in the regular menu.
Important Features in the Adjustment Program Epson XP-15000
Before you decide to download, first know the power of the tool you will be using. Here are its core features:
1. Waste Ink Counter Reset (Flagship Feature)
This is a lifesaver function. With a few clicks, the annoying full ink pad error will disappear, and the printer can go back to printing as usual.
2. EEPROM Reset & Adjustment
EEPROM is the memory where the printer stores all its important settings. This feature allows you to read and reset that data, useful for resolving more complex errors.
3. Printer Mechanism Check
This feature allows you to perform tests on various mechanical components of the printer, ensuring that everything is working properly before and after the reset process.
4. Ink Charging and Head Cleaning
Ensure the ink system is properly filled and perform a thorough cleaning of the printer head to resolve the problem of lines on the print or nozzle clogging.
How to Download and Use the Adjustment Program Epson XP-15000
The following guide is compiled based on the experience of experienced printer technicians who have performed hundreds of resets in safe and effective methods. Follow the steps below carefully and don’t rush.
Step 1 – Download the Adjustment Program Epson XP-15000
Click the link below to download the program file safely:
File Information:
- File Name: Epson Reset XP-15000.rar
- File Size: ±8 MB
- Format: RAR
- Compatibility: Windows 7, 8, 10, and 11 (32-bit & 64-bit)
- Copyright © 2019 mincom. All Rights Reserved.
Note: If the antivirus marks a file as a threat, it’s likely a false positive. Temporarily disable antivirus software for the extraction process to run smoothly.
Step 2 – Extract the Downloaded Files
The downloaded file is still in a compressed format. To open the contents, use an app like WinRAR or 7-Zip.
How to Extract:
- Right-click on the Reset Epson XP-15000.rar file
- Select “Extract Here” or “Extract to Folder”
- Enter the following password when prompted:
Password: mincom - Wait for the extraction process to complete, and a complete program folder will appear containing the AdjProg.exe file
Step 3 – Printer and Computer Preparation
Before running the program, make sure the following conditions are met:
- Epson XP-15000 printer on (ON)
- USB cable connects directly to the computer (avoid via USB hub)
- Close all printer-related applications (including monitor status or Epson Utility software)
- Run the computer using an Administrator account to avoid access errors
Step 4 – Running the Program and Resetting
Follow these guidelines to perform the reset process safely:
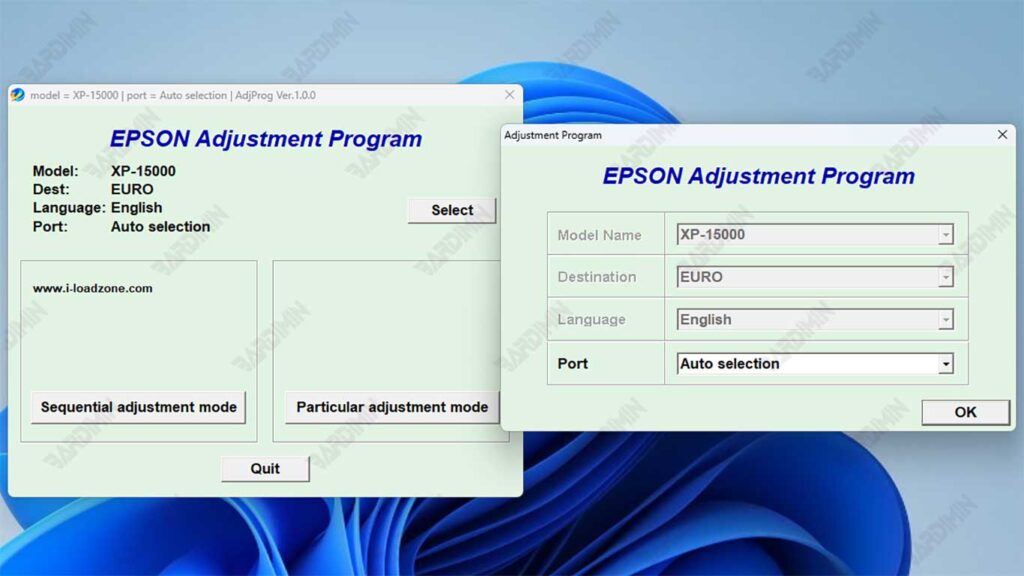
- Open the AdjProg.exe file by right-clicking → Run as Administrator
- In the main window, select the printer model “Epson XP-15000”
- Select the USB port according to the printer’s connection, then click OK
- Go to the menu “Particular Adjustment Mode”
- Click and select the option”Waste Ink Pad Counter”
- Check the second option:
– Main Pad Counter
– Platen Pad Counter - Click the “Check” button to see the current counter value
- Press the “Initialization” key to reset the counter value to 0 (nol)
- Wait for the program to display the message “Finished”
- Close the application AdjProg.exe after the process is complete
Step 5 – Restart the Printer
The last step that is often overlooked is to physically restart the printer so that the reset results are stored perfectly.
How to Restart Correctly:
- Turn off the printer completely
- Unplug the power cord from the power outlet
- Wait ±30 seconds
- Restart the printer
Once turned on, the Epson XP-15000 printer will return to normal and be ready to use without the error message “Ink Pad is Full”.
Disclaimer: This guide was created based on experience and technical knowledge. The author and related parties are not responsible for any damages arising from the use of this information. Do it with full awareness of the risks.