Experiencing slow file search in Windows 11 File Explorer? This article discusses the root cause, particularly the “search in file contents” feature, and provides practical solutions to significantly increase your file and folder search speed.
For professionals, technicians, or gamers, time is a valuable resource. Waiting for slow file search results in Windows 11 can disrupt workflow and productivity. One of the main causes of slow Windows 11 file search speed is the suboptimal setting of the “search in file contents” feature. Let’s discuss and fix it.
Why is File Search in Windows 11 Slow?
Windows Search uses an index, like a library catalog, to find files quickly. However, its performance drops when you search in non-indexed locations (like external drives or network folders) with the wrong settings.
The “Always search file names and contents” feature is the main culprit. When active in non-indexed locations, Windows will open and scan the contents of every file (DOC, PDF, etc.) to match keywords. This process is very resource-intensive and time-consuming, making File Explorer search feel extremely slow.
How to Disable Search in File Contents for Maximum Speed
Here are the steps to optimize search settings and instantly improve your Windows 11 file search speed:
- Open File Explorer (press Windows + E).
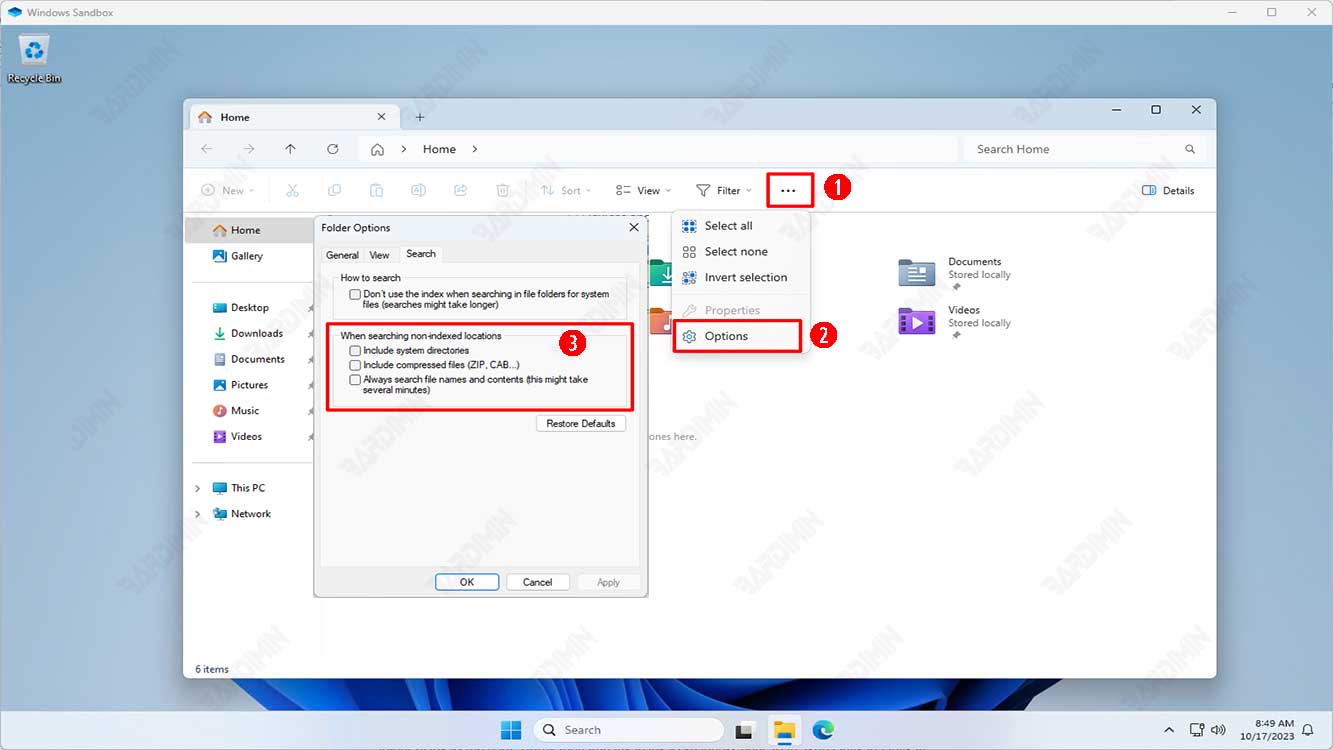
- Click the three dots (…) in the top menu bar, then select “Options”.
- Go to the “Search” tab.
- In the “How to search” or “When searching non-indexed locations” section, ensure the following option is selected:
✔ “In indexed locations, search file names and contents. In non-indexed locations, search file names only.” - Also, make sure the checkbox for “Don’t use the index when searching in file folders for system files (searches might take longer)” is cleared (unchecked).
- Click “Apply” then “OK”.
With this change, Windows will only search by file name in non-indexed locations, so your file search speed will increase dramatically.
Advanced Optimization: Manage Search Index
If you frequently search in a specific folder (e.g., a project folder on D: drive), add that folder to the Windows index. This way, searching for file names AND contents in that folder will remain fast.
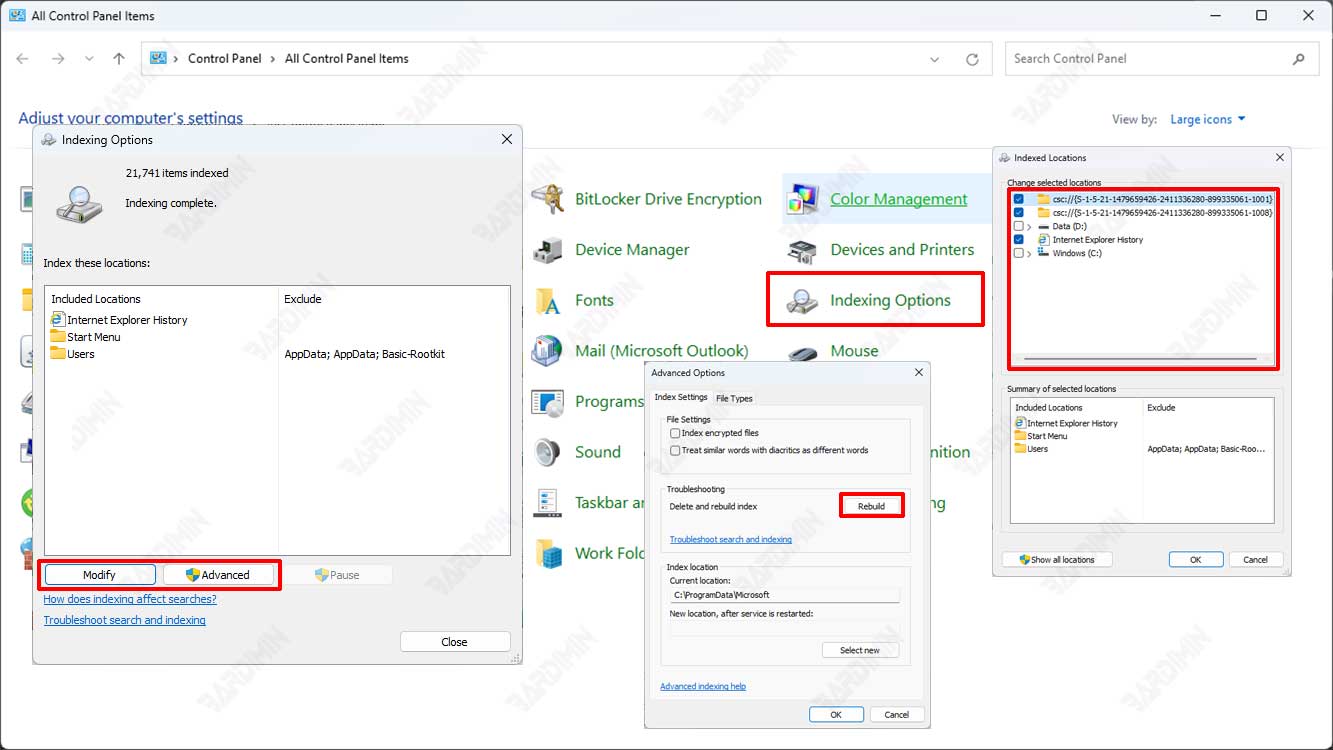
- Open Control Panel > Indexing Options.
- Click “Modify”.
- Expand directories and check the folder you want to index (e.g., Local Disk (D:) or a specific folder).
- Click “OK”. Windows will start indexing the folder’s content in the background.
Power User Alternative: Use Third-Party File Search Tools
For advanced search needs that are faster than Windows‘ built-in search, consider dedicated software. These tools use their own highly efficient indexing methods.
- Everything (voidtools.com): The king of speed. Instantly finds all files by name. Very lightweight and supports advanced queries (Official Source).
- Listary: More than a file search tool, integrates well with File Explorer and supports quick search with keyboard shortcuts.
Both tools are highly recommended for technicians and users who value time efficiency.
Conclusion
The problem of slow File Explorer search in Windows 11 is often not due to hardware, but software configuration. By disabling the search in file contents feature for non-indexed locations, you have applied the most effective solution to improve Windows 11 file search speed.
For the best experience, combine this setting with adding important work folders to the Windows index and consider tools like Everything for maximum productivity. With these steps, you can save valuable time and refocus on your work or game.