Searching for specific words in a Word document is common. But what if you need to locate all bolded text, for example, to analyze formatting or ensure document consistency? Microsoft Word’s Find and Replace feature offers advanced capabilities to search by formatting, including how to find bold text in Word. This guide explains the process step-by-step.
For technical writers, editors, or professionals handling long documents, maintaining consistent formatting is crucial. Learning how to find bold text in Word becomes an invaluable tool for efficient auditing and editing.
Step-by-Step Guide to Find Bold Text in Word
Here is a practical guide to locate all bold-formatted text in your document. This process works for Microsoft Word 2016, 2019, 2021, and Microsoft 365 versions.
- Open Your Document: Launch Microsoft Word and open the file you want to check.
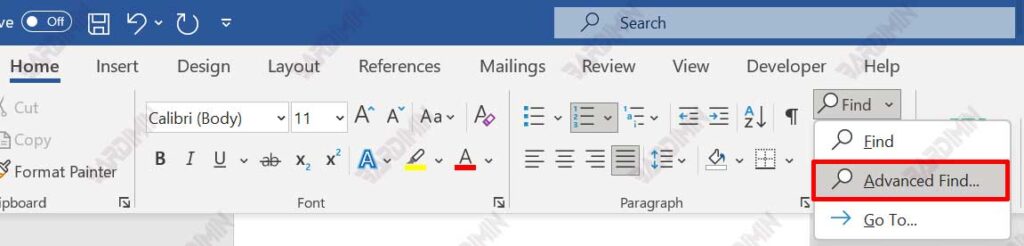
- Access Advanced Find: Go to the “Home” tab, find the “Editing” group, and click “Find”. Select the “Advanced Find” option. A quicker method is to use the keyboard shortcut Ctrl + H (Find and Replace).
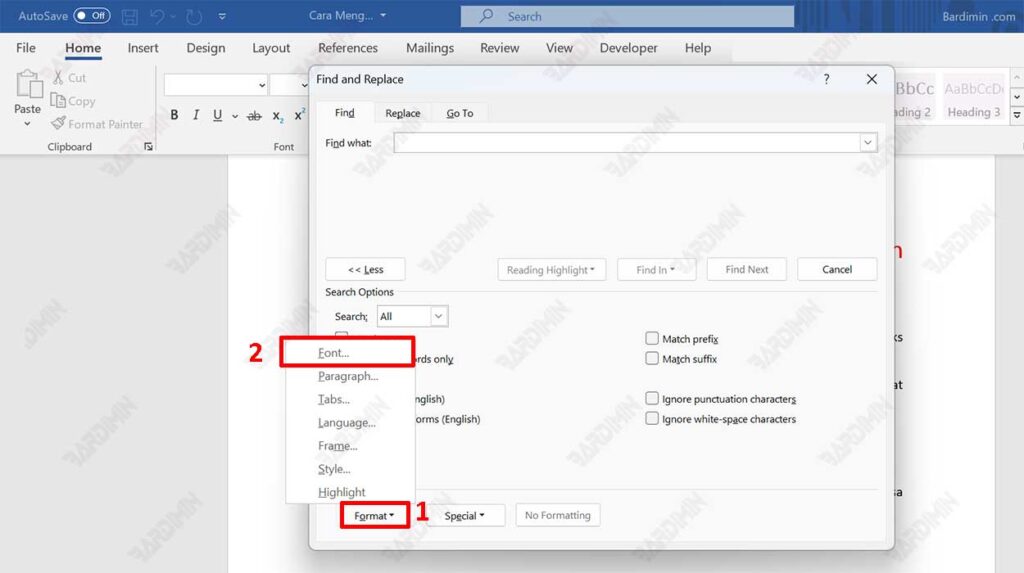
- Open the Format Menu: In the “Find and Replace” dialog box, ensure your cursor is in the “Find what:” field. Click the “More >>” button to show advanced options. Then, click the “Format” button at the bottom and select “Font…” from the list.
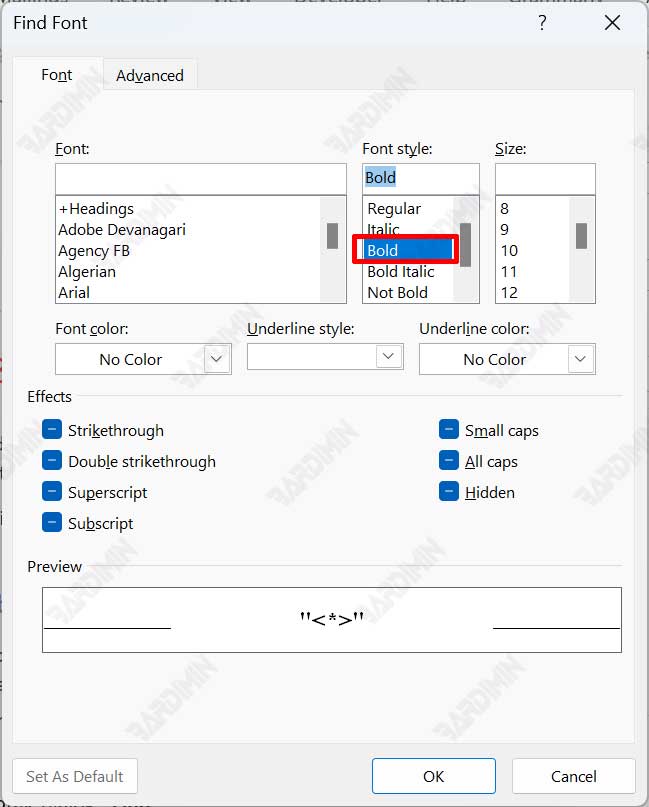
- Set the Bold Format: The “Find Font” dialog box will appear. In the “Font style” section, select or highlight “Bold”. Then, click “OK”. You will see the text “Font: Bold” displayed below the “Find what” box.
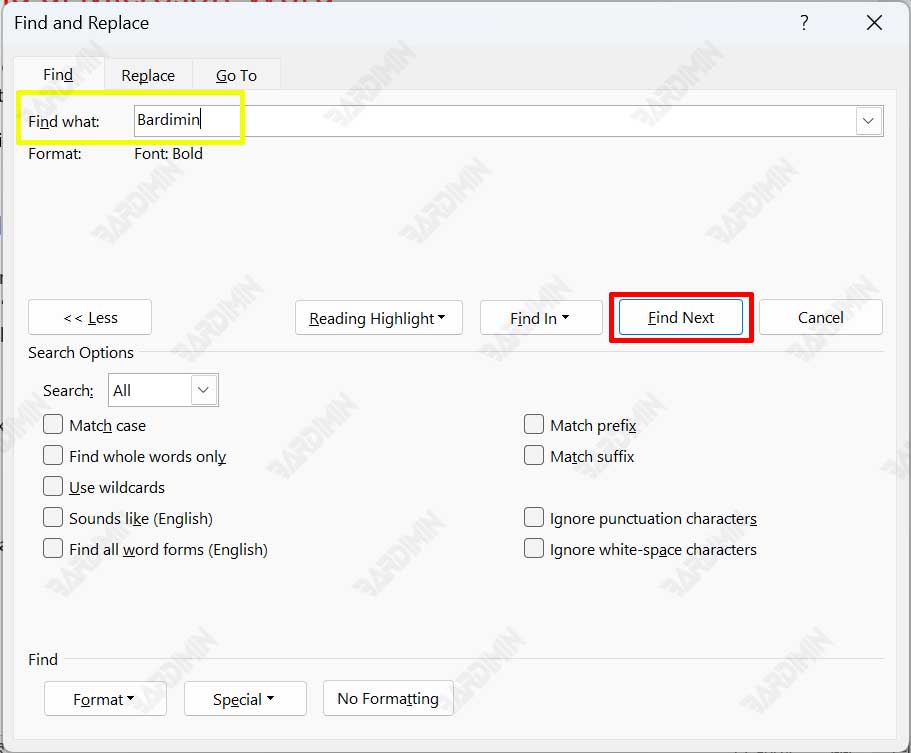
- Start the Search: To find all bold text, leave the “Find what:” field empty. However, if you want to find a specific word only when it’s bold (e.g., a chapter title), type that word in the field. Next, click “Find Next” to browse results one by one, or click “Find In” > “Main Document” to highlight all instances at once.
Practical Tips and Applications for Professionals
This feature is not just for searching. You can leverage it for various productive tasks.
- Document Quality Control: Ensure all subheadings or key terms are consistently bold without any missed instances.
- Bulk Editing: After finding all bold text, you can immediately change its format to italic or normal using the “Replace” feature. To do this, in the same dialog box, switch to the “Replace” tab, set the target format in “Replace with:”, and click “Replace All”.
- Document Analysis: Technicians or technical writers can quickly evaluate a document’s structure based on the distribution of bold text.
By mastering how to find bold text in Word, you enhance your document processing efficiency. This process saves significant time compared to manual checking, especially for files with hundreds of pages. This feature exemplifies the depth of tools available in the Office suite for professionals.
Helpful Reference: For official information on advanced search features, you can refer to the Microsoft Office Support documentation.