Testing RAM health is crucial for maintaining computer system stability. This article discusses signs of RAM failure and provides a step-by-step guide using two trusted diagnostic tools, Windows Memory Diagnostic and MemTest86, to ensure optimal memory performance.
Random-access memory (RAM) is a vital computer component that functions as high-speed temporary data storage. RAM allows applications and the operating system to access information quickly. Overall computer performance heavily depends on RAM condition. Therefore, knowing how to test RAM is an essential skill for technicians and advanced users.
Like other electronic components, RAM can degrade or fail over time. Early signs of RAM failure are often subtle but can develop into serious problems. Common indicators include:
- Random system failures (blue screen of death or BSOD).
- Frequent application crashes or unresponsiveness.
- Computer freezes or sudden restarts.
- Corrupted or damaged saved files.
- Beep codes or memory error warnings during POST.
If you experience these symptoms, it is advisable to immediately perform a RAM test to confirm its condition. Below are two recommended testing methods.
1. Windows Memory Diagnostic Tool
This tool is a built-in Windows (10 & 11) utility that is practical. Its function is to scan for errors on physical memory modules. This method is suitable for quick initial diagnosis without external devices.
Steps to Use Windows Memory Diagnostic
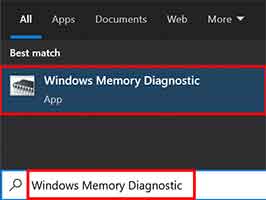
Step 1: Open the Tool
Type “Windows Memory Diagnostic” in the Start menu or search bar. Then, run the application.
Step 2: Start Testing
Select the option “Restart now and check for problems (recommended)“. The system will immediately restart.

Step 3: Wait for Completion
Let the tool work through several testing phases. This process takes a few minutes. Upon completion, the computer will restart automatically.
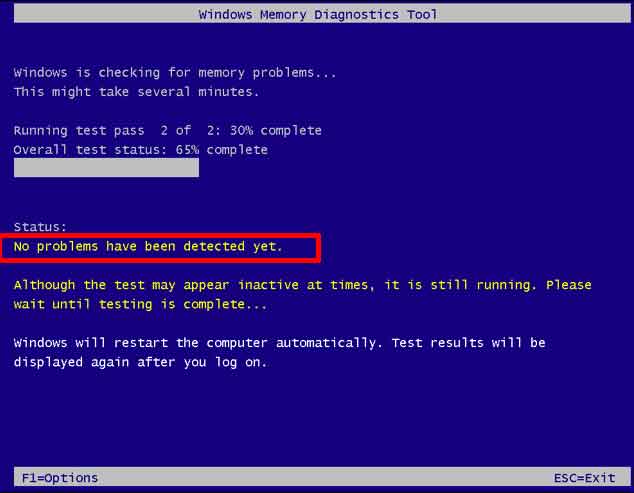
To view the results, open Event Viewer > Windows Logs > System. Look for events with the source “MemoryDiagnostics-Results“. The results will show wheter there are any errors.
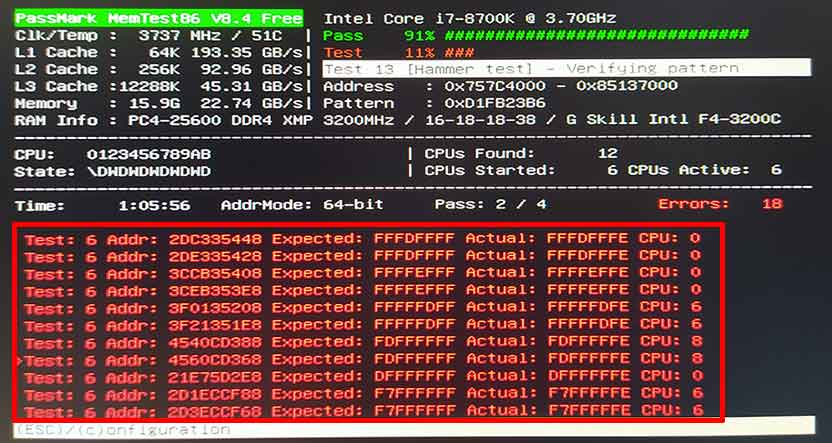
2. MemTest86: Comprehensive Diagnostic Tool
For those needing deeper analysis, MemTest86 is the professional solution. This tool by PassMark Software runs in a standalone boot environment (not within Windows). Its advantage is broader and more accurate test coverage to detect complex errors.
Guide to Using MemTest86
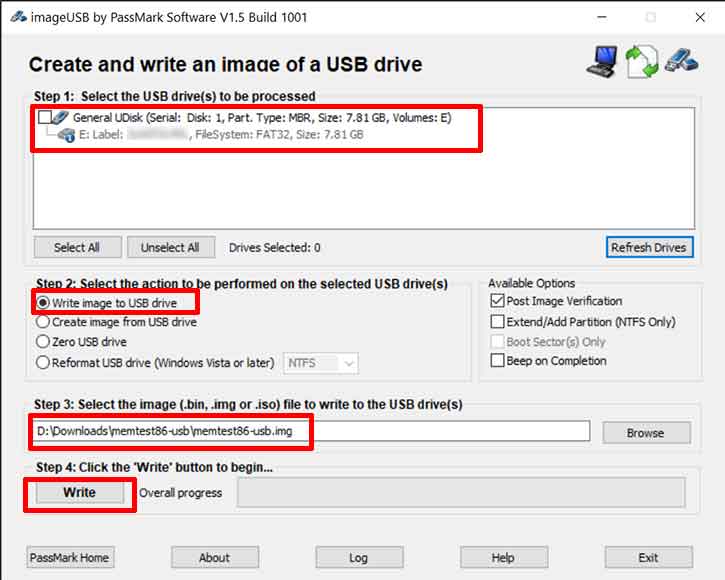
Step 1: Download and Prepare Boot Media
Download the MemTest86 installer from the official website. Use the included imageUSB tool to make a USB flash drive bootable.
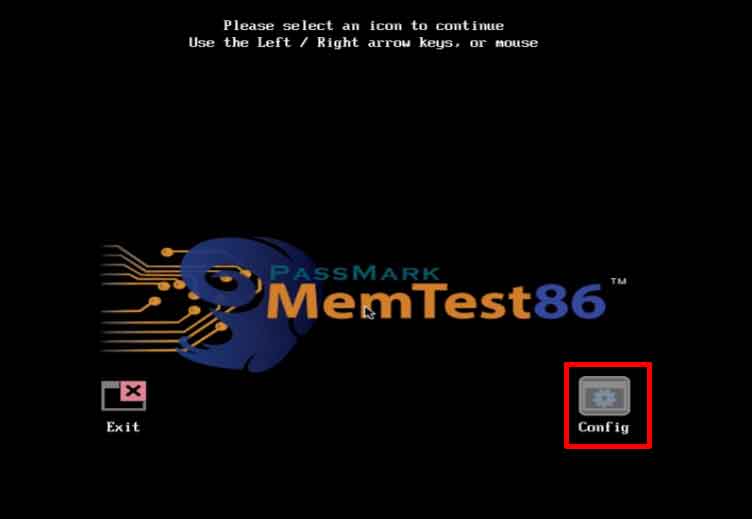
Step 2: Boot from USB and Run Test
Restart the computer and set the boot priority to the USB drive. After MemTest86 loads, the test will run automatically or you can enter the “Config” menu and select “Start Test“.
Step 3: Analyze Results
Let the test run at least through one complete pass (can take several hours). Any errors found will be clearly displayed on screen. Even a single error indicates a problem with the RAM.
If errors are found, try cleaning the RAM pins and slots, then test again. Persisting errors mean that RAM module needs replacement.
By understanding how to test RAM using both tools, you can proactively diagnose system stability issues. Regular checks can prevent data loss and productivity disruptions. Always ensure to get information and software from trusted official sources.