Value constraint is a feature in Excel that allows you to limit the values that can be entered into a cell. This feature can be used to prevent users from entering invalid or unwanted data.
Excel is one application that is often used to process data, both numeric, text, and date data. However, sometimes we need to limit the input values that can be entered into a specific cell so that the data we enter is valid and matches the criteria we want.
For example, we want to limit cells that can only be filled with numbers between 1 to 10, or can only be filled with certain text, or can only be filled with date format. How to do it?
One of the features that we can use to limit input values in Excel cells is “Data Validation”. Data Validation is an Excel feature used to create data validation criteria in cells or ranges so that data inputted into cells or ranges must meet these criteria. If the data entered does not match the criteria, then Excel will display an error message or error alert.
By using Data Validation, we can create various kinds of data validation criteria, such as:
- Whole Number: to limit cells can only be filled with whole numbers in a certain range.
- Decimal: to limit cells can only be filled with decimal numbers in a certain range.
- List: to limit cells can only be filled with selected values from a predefined list or list.
- Date: to limit cells can only be filled with date format in a certain range.
- Time: to limit cells can only be filled with time format in a certain range.
- Text Length: to limit cells can only be filled with text with a certain number of characters.
- Custom: to delimit cells by using a specific formula or formulas.
In this article, we will discuss how to use Data Validation to limit input values in Excel cells with some example cases. Let’s get started!
How to Limit Excel Cells Can Only Be Filled with Numbers Only
One case that often happens is that we want to limit Excel cells to only be filled with numbers, without any other characters such as letters, symbols, or spaces. This is useful to prevent data input errors, for example, if we want to calculate the average of students’ grades, then we must ensure that cells containing student grades contain only numbers.
To limit Excel cells can only be filled with numbers, we can use Data Validation with the type Whole Number or Decimal. Here are the steps:

- Select (select) cells or ranges that you want to limit input to numbers only. For example, we want to limit column B which contains student grades to only be filled with numbers.
- Click the “Data” menuon the Excel ribbon, then click “Data Validation” in the “Data Tools” group. Alternatively, we can also use the keyboard shortcut Alt + A + V + V.
- In the Data Validation dialog box, select the “Settings” tab, then select “Whole Number” or“Decimal” in the “Allow” drop-down list. The difference between Whole Number and Decimal is that Whole Number only allows whole numbers, while Decimal allows decimal numbers.
- In the “Minimum” and “Maximum” boxes, enter the range of number values allowed to be entered into the cell. For example, if we want to limit a student’s score between 0 and 100, then enter 0 in the Minimum box and 100 in the Maximum box. If we don’t want to limit the range of number values, then leave the Minimum and Maximum boxes blank.
- Click “OK” to apply the Data Validation.
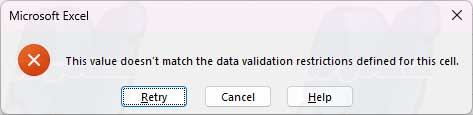
After that, try entering the values into column B. If the values entered are numbers in the specified range (for example between 0 and 100), then Excel will accept the input. However, if the value entered is not a number or outside the specified range, then Excel will display an error message such as the following:
We can change this error message to our liking, by clicking the “Error Alert” tab in the Data Validation dialog box, and then filling the “Title” and “Error Message” boxes with the text we want.
How to Limit Excel Cells to Only Be Filled with Specific Text
Another possible case is that we want to limit Excel cells can only be filled with certain text, for example, city name, country name, or product name. This is useful to ensure that the data we enter is consistent and there are no typos.
To limit Excel cells that can only be filled with certain text, we can use Data Validation with List type. Here are the steps:
- Select (selection) cells or ranges that you want to limit input to only certain text. For example, we want to limit column C which contains city names can only be filled with predefined city names.
- Click the “Data” menu on the Excel ribbon, then click “Data Validation” in the “Data Tools” group. Alternatively, we can also use the keyboard shortcut Alt + A + V + V.
- In the Data Validation dialog box, select the “Settings” tab, then select “List” in the “Allow” drop-down list.
- In the “Source” box, enter a list of texts that are allowed to be entered into cells, separated by commas. For example, if we want to limit the city name to only be filled with Jakarta, Surabaya, Bandung, or Yogyakarta, then enter Jakarta, Surabaya, Bandung, and Yogyakarta in the Source box. Alternatively, we can also select the range that contains the text list, for example, A1:A4.
- Click OK to apply the Data Validation.
After that, try entering text into column C. If the text entered is one of the specified text lists (e.g. Jakarta, Surabaya, Bandung, or Yogyakarta), then Excel will accept that input. However, if the entered text is not one of the specified text lists, then Excel will display the error message as before.
In addition, Excel will also display a small arrow to the right of the cell that has the Data Validation type List. If we click the arrow, then Excel will display a list of text that we can choose to fill the cell. This is useful to make it easier for us to select the appropriate text without having to type it.
How to Restrict Excel Cells to Only Fill with Date Format
Another case that may occur is that we want to limit Excel cells can only be filled with date format only, for example, to fill birth data, transaction data, or other data related to time. This is useful to ensure that the data we enter is valid and matches the date format we want.
To limit Excel cells can only be filled with date format, we can use Data Validation with Date type. Here are the steps:
- Select (select) cells or ranges that you want to limit input to date format only. For example, we want to limit column D which contains birth data to date format only.
- Click the “Data” menu on the Excel ribbon, then click “Data Validation” in the “Data Tools” group. Alternatively, we can also use the keyboard shortcut Alt + A + V + V.
- In the Data Validation dialog box, select the “Settings” tab, then select “Date” in the “Allow” drop-down list.
- In the “Minimum” and “Maximum” boxes, enter the date range allowed to be inserted into the cell. For example, if we want to limit birth data between January 1, 1990, and December 31, 2020, then enter 1/1/1990 in the Minimum box and 31/12/2020 in the Maximum box. If we don’t want to limit the date range, then leave the Minimum and Maximum boxes blank.
- Click OK to apply the Data Validation.
After that, try entering dates into column D. If the dates entered are within the specified range (e.g. between January 1, 1990, and December 31, 2020), then Excel will accept those inputs. However, if the date entered is outside the specified range, then Excel will display the error message as before.
In addition, Excel will also display a small calendar to the right of the cell that has Data Validation type Date. If we click the calendar, then Excel will display a selection of dates that we can choose to fill in the cell. This is useful to make it easier for us to choose the appropriate date without having to type it.
How to Limit Excel Cells by Using a Formula or Formula
Another possible case is that we want to delimit Excel cells by using specific formulas or formulas, for example, to fill data that depends on other data, or to create more complex and specific data validation criteria. This is useful for making Data Validation more flexible and dynamic.
To limit Excel cells by using formulas or formulas, we can use Data Validation with Custom type. Here are the steps:
- Select (select) the cells or ranges that you want to limit input by using formulas or formulas. For example, we want to limit column E which contains student status to only be filled with Pass or Not Pass, depending on the student’s grade in column B.
- Click the “Data” menu on the Excel ribbon, then click “Data Validation” in the “Data Tools” group. Alternatively, we can also use the keyboard shortcut Alt + A + V + V.
- In the Data Validation dialog box, select the “Settings” tab, then select “Custom” in the “Allow” drop-down list.
- In the “Formula” box, enter the formula or formulas used to limit data input. This formula or formula must return a value of TRUE or FALSE, depending on whether or not the entered data meets the validation criteria. For example, if we want to limit the student status can only be filled with Pass if the student’s grade is more than or equal to 60, and Not Pass if the student’s grade is less than 60, then enter the following formula:
=IF(B2>=60,E2= “Pass”,E2= “Not Pass” )
This formula means: If the student’s grade in column B is greater than or equal to 60, then the student’s status in column E must be equal to “Pass”. If not, then the status of the student in column E must be the same as “Did Not Pass”. - Click OK to apply the Data Validation.
After that, try entering the text into column E. If the entered text matches the specified formula or formulas (e.g. Pass if the student’s grade is more than or equal to 60, and Not Pass if the student’s grade is less than 60), then Excel will accept that input. However, if the entered text does not match the specified formula or formula, then Excel will display the error message as before.
Conclusion
By using Data Validation, we can limit the input value in Excel cells according to the data validation criteria we want. Data Validation has various types of data validation, such as Whole Numbers, Decimal, List, Date, Time, Text Length, and Custom. By using the type of data validation that suits our needs, we can make the data we enter into Excel more valid and consistent.
Thus the article on how to limit input values in Excel cells by using Data Validation. Hope this article was useful and can help you achieve better rankings on Google. Thank you for reading this article to the end! ?