Creating a macro in Excel is an intelligent solution for automating repetitive tasks, significantly increasing work efficiency. This article guides you step by step, from activating the Developer feature to recording and running your first macro, complete with a practical example for automatic cell formatting.
Performing the same task repeatedly in Microsoft Excel can be time-consuming and error-prone. To overcome this, you can utilize the macro feature. An Excel macro acts as an action recorder. It records every mouse click and keystroke you perform. Subsequently, you can run that recording anytime to instantly repeat a series of commands. Thus, your productivity will increase rapidly.
However, the macro feature is not immediately visible on the Excel ribbon. Therefore, the first step is to activate the Developer tab. Furthermore, it is important to understand that macros are written in VBA (Visual Basic for Applications). Basic VBA knowledge allows you to edit and customize macros for more complex needs.
How to Activate the Developer Tab in Excel
The Developer tab contains all the tools for working with macros and VBA. This tab is hidden by default. Follow these steps to display it:
- Open the Microsoft Excel application.
- Click the File menu in the top left corner.
- Select Options from the list that appears.
- In the Excel Options window, choose Customize Ribbon.
- In the right panel (Customize the Ribbon), check the box next to Developer.
- Click OK to save the changes.

After that, the Developer tab will appear on the main Excel ribbon. This tab becomes the gateway to all automation functions, including creating a macro in Excel.
Steps to Record a Macro in Excel
Recording a macro is a simple process. You just need to perform the commands you want to automate. Excel will translate them into VBA code. Follow this guide:
- Open a workbook and select the cell or cell range you want to work on.
- Go to the Developer tab.
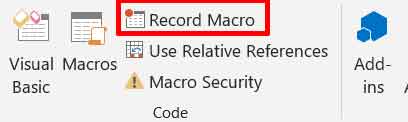
- Click the Record Macro button.
- In the Record Macro dialog box, give your macro a name. Avoid spaces.
- Optionally, assign a Shortcut Key (e.g., Ctrl+Shift+M) to run the macro quickly. Ensure the shortcut does not conflict with Excel’s built-in commands.
- Choose where to store the macro, usually This Workbook.
- Click OK to start recording.
- Perform all the actions you want to automate (formatting cells, entering formulas, etc.).
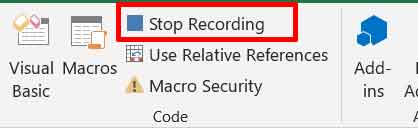
- When finished, return to the Developer tab and click Stop Recording.
The recording process is now complete. You have successfully created a macro in Excel. The macro is ready to run anytime.
Practical Example: Create a Macro for Cell Formatting
Let’s create a concrete example. You will create a macro to instantly apply borders, change the font, and format numbers.
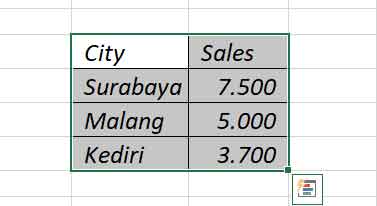
- Prepare a simple data table in a worksheet.
- Select the cell range to be formatted.
- Follow the macro recording steps above. Name it “BasicFormat”.
- After clicking OK, perform the following actions:
- Go to the Home tab > Font group > select All Borders.
- Change the Font Size to 11 and set it to Bold.
- Number format: click the Number group > select Currency.
- Click Stop Recording.
How to Run and Edit a Macro
To run the macro, select the target cells. Open the Developer tab, click Macros. Select the macro name (e.g., BasicFormat) and click Run. The selected cells will be instantly formatted.
If adjustments are needed, you can edit the VBA code. From the Macro window, select the macro and click Edit. You will enter the Visual Basic for Applications (VBA) Editor. Here, you can modify the code manually. Official Microsoft resources, such as the Excel VBA documentation, are very useful for learning more syntax.
Important Note: Files containing macros must be saved in the Excel Macro-Enabled Workbook (*.xlsm) format. If saved as *.xlsx, all macro code will be lost. Always pay attention to security warnings when opening macro-enabled files from unknown sources.
By mastering how to create a macro in Excel, you save time and reduce manual work. Start with simple, repetitive tasks. Next, explore VBA code to develop more sophisticated automation tailored to your specific workflow.