In today’s digital era, internet security and speed are two important factors for internet users. Every day, we rely on an internet connection for various activities, from communicating, and working, to enjoying entertainment.
However, as reliance on the internet increases, so do the risks associated with security and privacy. Therefore, we must make sure that the internet connection we use is not only fast, but also safe from cyber threats.
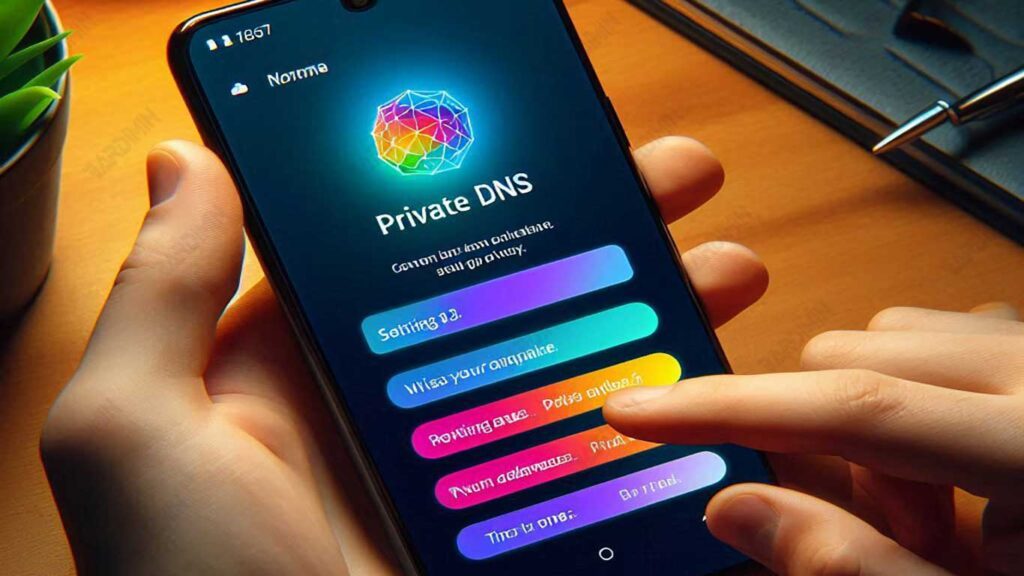
One way to improve the security and speed of internet access is to use Private DNS. Private DNS is a feature that allows us to use DNS servers that are more secure and faster than the built-in DNS servers provided by internet service providers. With Private DNS, we can enjoy various benefits, such as protection against cyberattacks, increased privacy, and better internet performance.
In this article, Bardimin will discuss in detail how to use Private DNS on Android devices, as well as the benefits that can be obtained from using it.
What is Private DNS?
Private DNS is a feature that allows users to use a specific DNS server of their choosing, in contrast to the DNS servers provided by internet service providers (ISPs) by default. Private DNS is designed to improve security, privacy, and internet access speed by using more reliable and efficient servers.
Perbedaan antara DNS Publik dan Private DNS
- DNS Publik: DNS servers provided by ISPs or third parties that can be used by everyone. Examples include Google Public DNS (8.8.8.8, 8.8.4.4) and Cloudflare (1.1.1.1, 1.0.0.1).
- Private DNS: DNS servers are selected and configured by users to improve security and performance. This setting ensures that DNS data is encrypted and more difficult for unwanted third parties to access.
Why Use Private DNS on Android?
Using Private DNS on Android provides an additional layer of protection against phishing and malware attacks. A secure Private DNS server can block access to malicious websites that try to steal personal information or infect devices with malicious software. By encrypting DNS requests, Private DNS ensures that the data sent and received cannot be intercepted by malicious parties attempting to carry out attacks.
One of the main advantages of using Private DNS is increased privacy. Private DNS reduces the risk of tracking by third parties such as ISPs, advertisers, or other entities that may want to collect data about your browsing activity. Trusted Private DNS servers don’t keep DNS request logs, so your online activity remains anonymous and untraceable. This provides greater control over your data and reduces the chances of misuse of the information by unauthorized parties.
Using Private DNS can improve the performance and stability of your internet connection. Private DNS servers are often faster and more efficient at handling DNS requests compared to the default DNS servers of ISPs. This means that the time it takes to convert a domain name into an IP address can be reduced, so websites and online services can be accessed faster. In addition, reliable Private DNS can improve the stability of the internet connection by reducing latency and minimizing interference in the DNS resolution process.
Enabling Private DNS on Android devices not only provides security and privacy benefits but can also improve the user experience with a faster and more stable internet connection. Therefore, configuring Private DNS is a wise move to ensure that you get the most out of your internet connection.
How to Enable Private DNS on Android
1. Preliminary Preparation
- Make sure your Android device is connected to the internet: Before enabling Private DNS, make sure that your device has a stable internet connection. This is required to complete the DNS configuration.
- Make a note of the Preferred DNS Server you want to use: Specify and note the Preferred DNS Server you want to use. Some popular options are 1.1.1.1.1 (Cloudflare) and 8.8.8.8.8 (Google Public DNS).
2. Steps to Enable Private DNS Mode
- Access the Settings menu on your device.
- In the Settings menu, search for and select the Network & Internet.
- Scroll down and select Advanced to open additional network settings options.
- In the Advanced menu, search for and select Private DNS.
- Select the option Private DNS provider.
- Enter the hostname of the Preferred DNS Server you’ve already recorded, for example, dns.google for Google Public DNS or one.one.one.one for Cloudflare.
- After entering the hostname, be sure to save the settings by tapping Save.
3. Verify Settings
After configuring Private DNS, you can check if the setting is active by accessing a website or service that tests your DNS.
Tools or applications that can be used to verify:
- You can use an app like DNS Checker or WhatsMyDNS to verify that your device is using the configured Private DNS. The app will show you information about the DNS servers that your device is currently using.
- Another alternative is to visit a website like 1.1.1.1/help to check if you’re using Cloudflare DNS or dns.google to verify your use of Google Public DNS.
Popular Private DNS Examples
Google Public DNS
Server: 8.8.8.8, 8.8.4.4
- Pros: Google Public DNS is known for its reliability, high-resolution speeds, and global reach. These servers are widely used and easily accessible by users all over the world.
- Security: Provides protection against various online threats and reduces the risk of DDoS attacks.
- Privacy: Google has a strict privacy policy, although some users may be concerned about the data collected by Google.
Cloudflare
Server: 1.1.1.1, 1.0.0.1
- Pros: Cloudflare DNS is known for its speed and focus on privacy. They claim to be the fastest DNS in the world and do not keep logs of user activity.
- Security: Offers protection against online threats and has DNS-over-HTTPS (DoH) and DNS-over-TLS (DoT) features for additional encryption.
- Privacy: Cloudflare takes user privacy seriously with a no-logs policy, so your personal information remains safe.
OpenDNS
Server: 208.67.222.222, 208.67.220.220
- Pros: OpenDNS, which is owned by Cisco, offers high speed and security. Additionally, they provide additional services such as content filtering and protection against phishing.
- Security: Provides advanced protection against cyber threats and allows users to block malicious websites.
- Privacy: OpenDNS has a transparent privacy policy and provides an option for users to configure their privacy preferences.
Tips and Tricks
How to Choose the Right Private DNS According to Your Needs
- Speed and Server Location: Choose a Private DNS that has servers near your location to reduce latency and improve access speeds. For example, Google Public DNS and Cloudflare are known for their high speeds and global reach.
- Security: Make sure the Private DNS you choose offers additional security features such as DNS-over-HTTPS (DoH) or DNS-over-TLS (DoT) to encrypt DNS requests and protect your data from cyberattacks.
- Privacy: If privacy is your top priority, choose a Private DNS that has a strict privacy policy and doesn’t keep logs of user activity. Cloudflare is one of the popular choices due to its strict privacy policy.
- Additional Features: Consider Private DNS which offers additional features such as content filtering, phishing protection, and parental controls. OpenDNS offers these features and can be configured as per your needs.
Troubleshooting Common Problems When Using Private DNS
- Unstable Internet Connection: If you experience an unstable connection after enabling Private DNS, try disabling it temporarily and check if the problem is resolved. Make sure that the hostname you entered is correct and that the Private DNS server you are using is working properly.
- Websites are Inaccessible: Some websites may be inaccessible due to blocking by Private DNS. If this happens, try using a different Private DNS server or adding an exception in your DNS settings.
- Slow Performance: If you experience slow performance, make sure that the Private DNS you choose is the fastest and closest to your location. Test a few Private DNS servers to find the best one for your connection.
Conclusion
Using Private DNS on Android devices offers a variety of significant benefits that can improve the user experience in browsing the internet. By enabling Private DNS, you can enjoy:
- Additional Security: Protection against phishing attacks, malware, and other cyber threats. DNS request encryption ensures that your data remains safe from interception by malicious parties.
- Better Privacy: Reduces the risk of tracking by third parties, such as ISPs and advertisers. Trusted Private DNS doesn’t keep logs of your activity, so your online privacy is more secure.
- Faster Internet Access Speed: A fast and efficient Private DNS server can improve the speed of DNS resolution so that web pages and online services can be accessed faster.
- Better Connection Performance and Stability: Reduces latency and improves the stability of your internet connection, which is essential for smooth and uninterrupted online activities.
Given these various benefits, it is highly recommended to enable Private DNS on your Android devices right away. The steps to configure Private DNS are quite simple and can be done quickly through your device’s settings. With a little effort, you can significantly improve the security, privacy, and performance of your internet connection.
Activate Private DNS now and enjoy safer, faster, and more private internet browsing!