ActiveX Controls are interactive components that can be used within Microsoft Excel to enhance spreadsheet capabilities. Using ActiveX Controls, users can create more attractive and flexible interfaces, such as Text Boxes, List Boxes, Combo Boxes, Check Boxes, and Option Buttons.
This feature is powered by Visual Basic for Applications (VBA), which allows users to write code to organize interactions between users and Excel worksheets.
The presence of ActiveX in Excel VBA is essential because it offers a wide range of advantages. ActiveX Controls provide more intuitive interactions, such as choosing from a list or entering text. Additionally, with VBA, users can customize the behavior and appearance of the controls as needed, such as automatically populating Combo Boxes from the database.
ActiveX also helps reduce input errors by providing structured controls, such as a Check Box for Yes/No options. ActiveX Controls can be integrated with VBA Macros, which allows for the automation of various tasks, including data validation and dynamic reporting.
Difference between ActiveX Controls and Form Controls in Excel
In Excel, there are two main types of controls that you can use: ActiveX Controls and Form Controls.
| Comparison | ActiveX Controls | Form Controls |
| Interactivity | More dynamic, programmable with VBA | Less flexible, only for essential functions |
| Customization | Resize, color, and other properties | Limitations in display settings |
| Compatibility | Only works on Windows and requires VBA | Can be used on Windows & Mac |
| Ease of Use | Need understanding of VBA for advanced setup | Easy to use without coding |
| Responsiveness | Can respond to events such as clicks, hovers, or inputs | Only has basic functions such as running macros |
If you need more complex controls and integration with VBA, then ActiveX Controls are the way to go. However, if you just want to use simple buttons or lists without the need for programming, Form Controls will suffice.
Enabling ActiveX Controls in Excel
If ActiveX Controls don’t work in Excel, Excel’s built-in security settings likely limit this feature. Microsoft automatically restricts the use of ActiveX Controls to avoid security risks, such as the execution of malicious code from untrusted sources. Therefore, you need to change the security settings in the Trust Center so that Excel can use ActiveX Controls more freely. You can enable an option that allows ActiveX controls to operate without restrictions or ask for confirmation before activating them.
Steps:
- Open the Microsoft Excel app.
- Click on the File menu, then select Options and proceed to Trust Center.
- In the window that appears, select Trust Center Settings….
- In the left panel, find and select ActiveX Settings.
- You will see several options; choose one of the following:
- Enable all controls without restrictions and without prompting
- Or, if you want a higher level of security, choose Prompt me before enabling all controls with minimal restrictions (Ask for confirmation before enabling all controls with minimal restrictions).
- Enable all controls without restrictions and without prompting
- After choosing, click OK and close all the settings windows that open.
Types of ActiveX Controls and How to Use Them
In Excel VBA, ActiveX Controls are used to improve interactivity and automation in worksheets. Here are some of the most commonly used controls and how to use them.
1. Text Box
The Text Box allows users to enter or display text in an Excel UserForm or worksheet. With VBA, we can set the content of the Text Box, either by filling in the data automatically or by receiving input from users.
How to Create a Text Box in Excel VBA
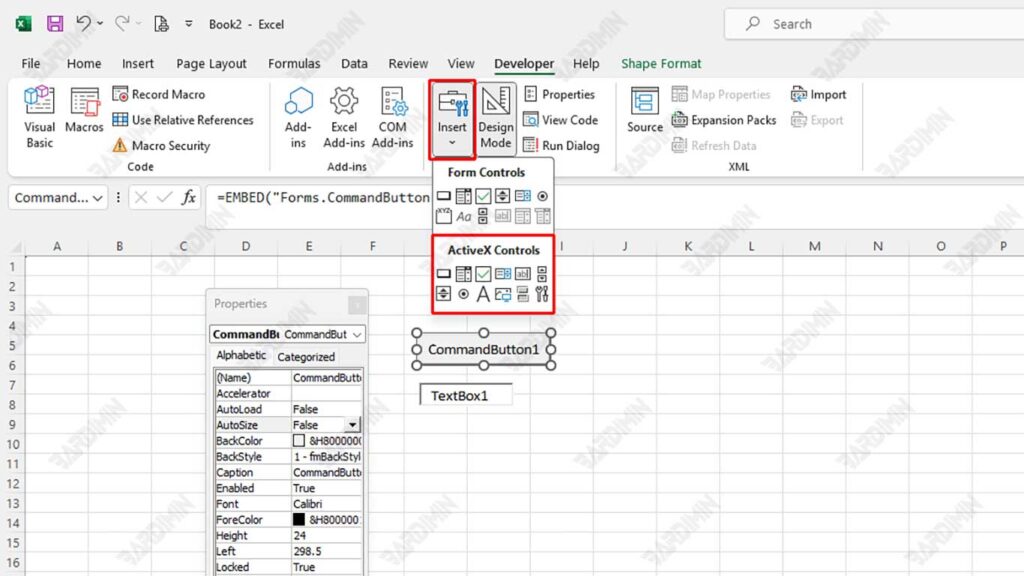
- Open Excel and enable the Developer tab.
- Select Developer > Insert > Text Box (ActiveX Controls).
- Click and drag to create a Text Box on the worksheet.
- To add a VBA code, right-click on Text Box and then select View Code.
Sample VBA Code to Automatically Fill Text Boxes
The following code will automatically populate the Text Box with text when it runs:
TextBox1.Text “Data imported successfully”2. List Box
List Box is a control element that serves to display a list of selections, allowing the user to select one or more items. This is especially useful in data input forms or for navigation between pages in applications that use Excel VBA.
How to Add Data to a List Box in Excel VBA
- Open the Developer Tab in Excel.
- Select Insert > List Box (ActiveX Controls).
- Click and drag to place the List Box on the worksheet.
- Right-click on List Box > Properties.
Example of VBA Code to Add Items to List Box
Use the following VBA code to add multiple city names to the List Box:
With Sheet1.ListBox1
     .AddItem    “Jakarta”
     .AddItem “Surabaya”
     .AddItem “Bandung”
End With
This code can be placed in Workbook_Open event so that the data will be loaded automatically when the file is opened.
Connecting List Boxes with Cells in Excel
To display the selected items from the List Box to a specific cell, perform the following steps:
- Right-click on List Box, then select Properties.
- Find the LinkedCell property and then enter the cell address (example: D3).
- Now, whenever the user selects an item in the List Box, the value will appear in the D3 cell.
If you want to retrieve the selected value using VBA, use the following code:
Range(“D3”).Value = ListBox1.Value3. Combo Box
Combo Box is an ActiveX control in Excel VBA that serves as a list of options that can be pulled down. Users can select a single item from the list or type their text. A Combo Box is often used in input forms to minimize errors when entering data, as users can only choose from the options that have been provided.
How to Add Dynamic Data to a Combo Box
To add a Combo Box to a worksheet, follow these steps:
- Open Excel and make sure that the Developer Tab is on.
- Click Developer > Insert > Combo Box (ActiveX Controls).
- Click and drag to draw Combo Box in the worksheet.
- Right-click on Combo Box, then select Properties.
Example VBA Code to Add Items to a Combo Box Dynamically
Use the following code to add items to the Combo Box automatically when the workbook is opened or the button is clicked:
ComboBox.Add  Item “Option 1”
ComboBox1.Add Item “Option 2”
ComboBox1.Add Item “Option 3”
Connecting Combo Boxes with Cells in Excel
To save the selected value in the Combo Box to a specific cell, perform the following steps:
- Right-click on Combo Box, then select Properties.
- Find the LinkedCell property and then enter the cell address (for example, D3).
- Now, whenever the user selects an item in the Combo Box, that value will appear in the D3 cell.
Alternatively, use the following VBA code to save the value of the option into the cell:
Range(“D3”).Value ComboBox1.Value4. Check Box
Check Box is a control that allows the user to select the Ya/Tidak or True/False option. This is useful for binary inputs such as confirmation of consent, feature selection, or activation/deactivation of a function in a form.
Using the Check Box to Save True/False Values
To add a Check Box in Excel VBA, follow these steps:
- Open the Developer Tab in Excel.
- Click Insert > Check Box (ActiveX Controls).
- Click and drag to place the Check Box on the worksheet.
- Right-click on Check Box > Properties.
Example of VBA Code to Connect a Check Box with a Cell
For Check Box to store values into cells based on their status, use the following code:
If CheckBox1.Value  = True Then
     Range(“D2”).Value  1
Else
     Range(“D2”).Value = 0
End If
This code will populate D2 cells with 1 if the Check Box is checked and 0 if it is not checked.
To make this function run automatically when the user clicks Check Box, use event Change inside the VBA Editor:
Private Sub CheckBox1_Click()
     If CheckBox1.Value  = True Then
     Range(“D2”).Value  1
     Else
         Range(“D2”).Value = 0
     End If
End Sub
5. Option Buttons
Both Check Box and Option Buttons are used to provide options to users, but there are important differences between the two:
| Feature | Check Box | Option Buttons |
| Function | Allows users to choose more than one option | Only one option can be selected in a group |
| Input Type | Binary value (True/False) | Exclusive options (only one active option in a group) |
| Use | Used to enable/disable features | Used to choose one of several options |
| Usage Examples | Choose additional features in a form | Choose a gender or payment method |
If the user needs to select more than one option, use Check Box. However, if you can only choose one of several options, use Option Buttons.
Steps to Create a Selection Button in Excel VBA
- Open Excel and enable the Developer tab.
- Select Developer > Insert > Option Button (ActiveX Controls).
- Click and drag to place two Option Buttons on the worksheet.
- Right-click on each Option Button and then select Properties.
- Rename (Name) to OptionButton1 and OptionButton2.
- Change the Caption to “Male” for OptionButton1 and “Female” for OptionButton2.
- To group the two buttons, place them in Frame (ActiveX Controls) or on the UserForm.
Example of VBA Code for Connecting Selector Keys with Cells
The following code will store a selection from the Option Button into the D3 cell according to the user’s choice:
If OptionButton1.Value  =  True Then Range(“D3”).Value “Male”
If OptionButton2.Value  =  True Then Range(“D3”).Value “Female”
To ensure this code runs automatically when the user clicks the button, use the following VBA events:
Private Sub OptionButton1_Click()
    Range(“D3”).Value =“Male”
End Sub

Private Sub OptionButton2_Click()
     Range(“D3”).Value =“Female”
End Sub
With this code, D3 cells will be automatically updated according to the choices made by the user.
6. Spin Button
Spin Button is a control used to increase or decrease the numerical value in a cell gradually. This is especially useful for numerical inputs, such as setting the number of goods, interest rates, or other parameters that have value limitations.
How to Set the Maximum and Minimum Values in the Spin Button
- Open the Developer Tab in Excel.
- Click Insert > Spin Button (ActiveX Controls).
- Click and drag to place the Spin Button on the worksheet.
- Right-click on the Spin Button, then select Properties.
Example of VBA Code to Set the Spin Button
Use the following code to set the Spin Button value limit:
SpinButton1.Max  = 100
SpinButton1.Min  = 0
To connect Spin Button with cells in Excel, use the following code:
Private Sub SpinButton1_Change()
    Range(“C3”).Value = SpinButton1.Value
End Sub
This code will ensure that every time the user presses the Spin Button key, the values in the C3 cell will change according to the values set in the controls.
Conclusion
ActiveX Controls in Excel VBA is a very useful feature for improving interaction and efficiency in data processing. With various controls such as Text Box, Combo Box, List Box, Check Box, Option Buttons, and Spin Button, users can create a more understandable interface, automate data filling, and reduce errors when filling out forms.
A key advantage of ActiveX Controls is its ability to be customized via VBA, which allows for automatic command execution and integration with databases or macros for more complex data management.
To maximize the use of ActiveX Controls, it is recommended to implement more advanced automation techniques such as UserForm usage, data validation, event handling, and conditional formatting to improve the user experience. Additionally, connecting ActiveX Controls with databases such as Microsoft Access or SQL Server can help in managing large amounts of data.
By applying these techniques, the data-filling process becomes more efficient, accurate, and professional. Therefore, understanding and implementing ActiveX Controls in Excel VBA can be the best solution for users who want to build a more structured and automated data input system.