Facebook Linkedin Medium Pinterest Twitter
  • Windows
  • Hardware
  • Networking
  • Database
  • Security
  • Software
  • Android
logo bardiminBardiminThe Beauty of Sharing Knowledge
  • Windows
  • Hardware
  • Networking
  • Database
  • Security
  • Software
  • Android
logo bardiminBardiminThe Beauty of Sharing Knowledge
Facebook
Linkedin
Medium
Pinterest
Twitter
  • Windows
  • Hardware
  • Networking
  • Database
  • Security
  • Software
  • Android
More
    • Windows
    • Hardware
    • Networking
    • Database
    • Security
    • Software
    • Android
    More
      Home Windows Tips and Tricks
      • Windows
      • Tips and Tricks

      How to Create and Set Up a “Guest Account” to Share Windows 11 PC Securely

      September 9, 2022
      81
      setting account

      Creating a “Guest Account” is a safe way if you have to share your computer with others.

      Guest accounts allow you to share your computer with people while maintaining your privacy. Guest account users can’t see your files and change Windows settings.

      How to create a guest account on Windows 11 differs slightly from previous versions of Windows. And in this tutorial, Bardimin will show you how to make it.

      Creating a guest account in Windows 11

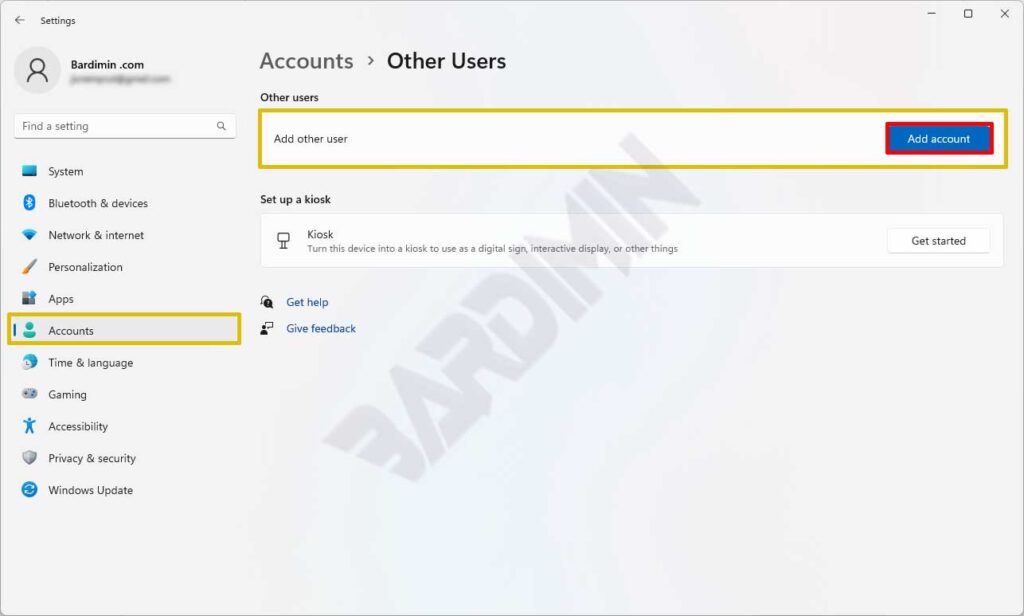
      1. Open “Settings“. You can use keyboard shortcuts (WIN + I).
      2. Navigate to “Accounts > Other users“. Then on “Add other user“, click the “Add account” button.
      setting account
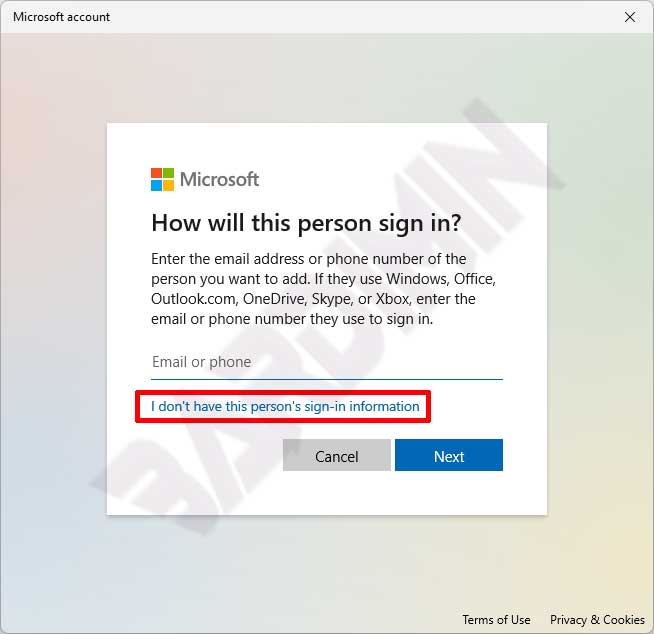
      1. Next, a pop-up window will appear, click “I don’t have this person’s sign-in information.
      setting account I dont have this persons sign in information
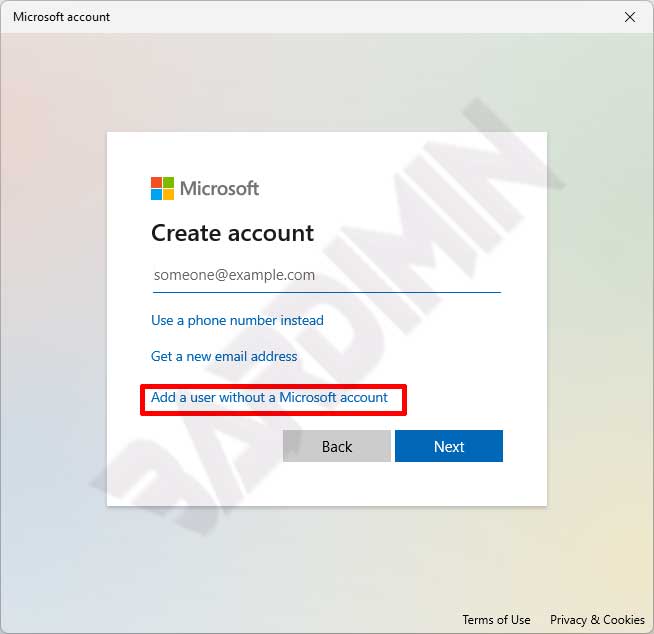
      1. Then select “Add a user without a Microsoft account.
      setting account Add a user without a Microsoft account
      1. After that, enter the “Username” and “Password“. And also complete the security questions to recover the password if you forget it. Click the “Next” button to create the account.
      setting account username

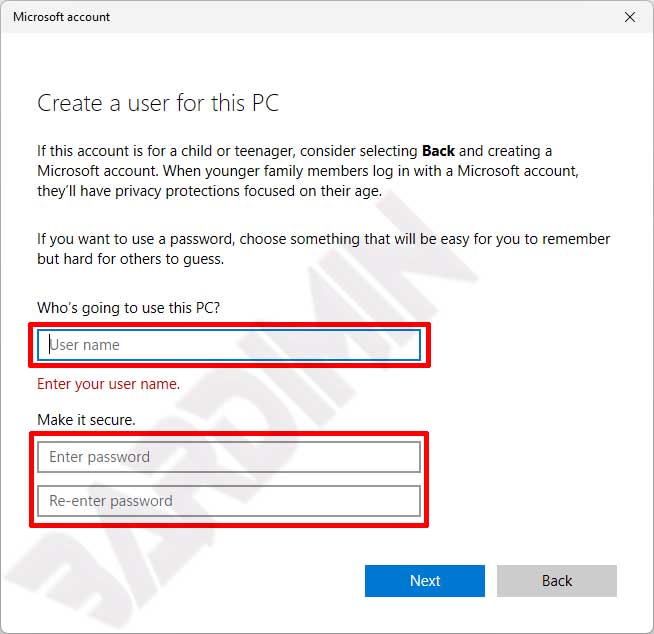
      Since you are going to create a Guest Account, creating such an account without a password may be a better option.

      1. The account is a “Standard User“ account. You need to change it to “Guest“.
      Other Interesting Articles
      • How to Create a Local Account in Windows 11
      • How to Solve Folder Access Denied Issue in Windows 11
      • How to Install Windows 11 on an Unsupported PC

      Add an account to the “Guest” user group

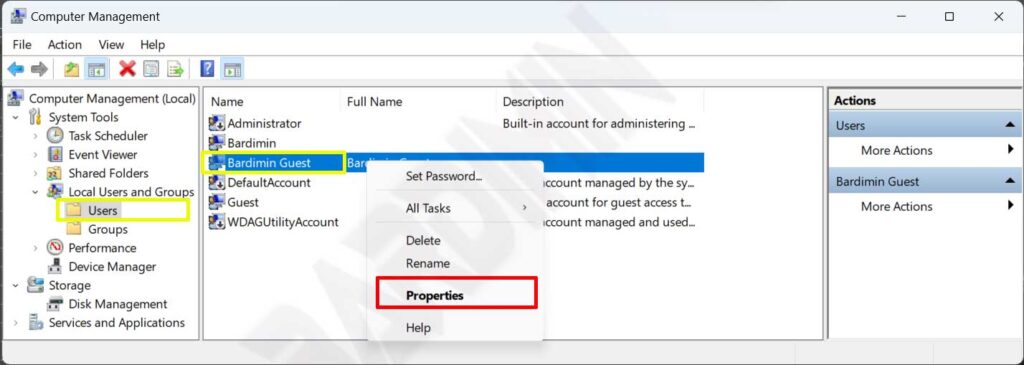
      1. Open “Computer Management“. You can open it by using (WIN + R) and typing “compmgmt.msc” and you can also open it by right-clicking the Start button and selecting “Computer Management”.
      2. Then navigate to “Local Users and Groups > Users“. In the right panel, select the Guest Account you created earlier and click the right. In the options, select “Properties“.
      compmgmt. user properties
      1. Next, in the Properties window, select the “Member Of” tab. Then remove the guest account membership from the “Users” group. Select the “Users” group and then click the “Remove” button.
      compmgmt. user properties remove grup
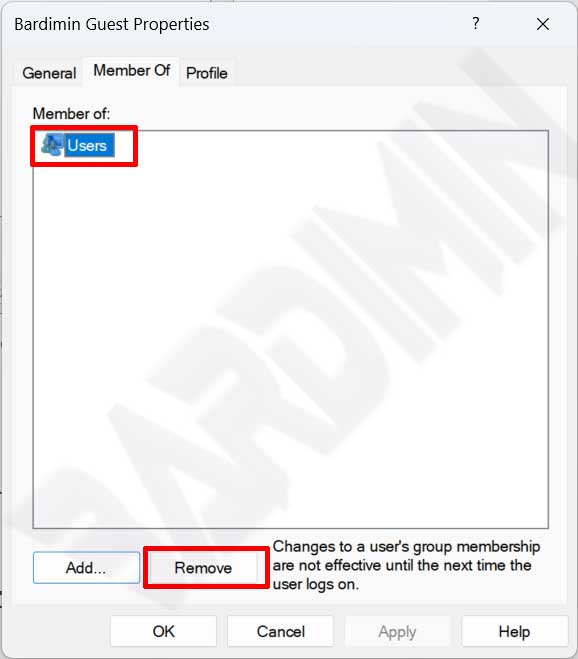
      1. After that, add the guest account to the “Guest” group. Click the “Add” button, and on the pop-up that appears, click the “Advanced” button.
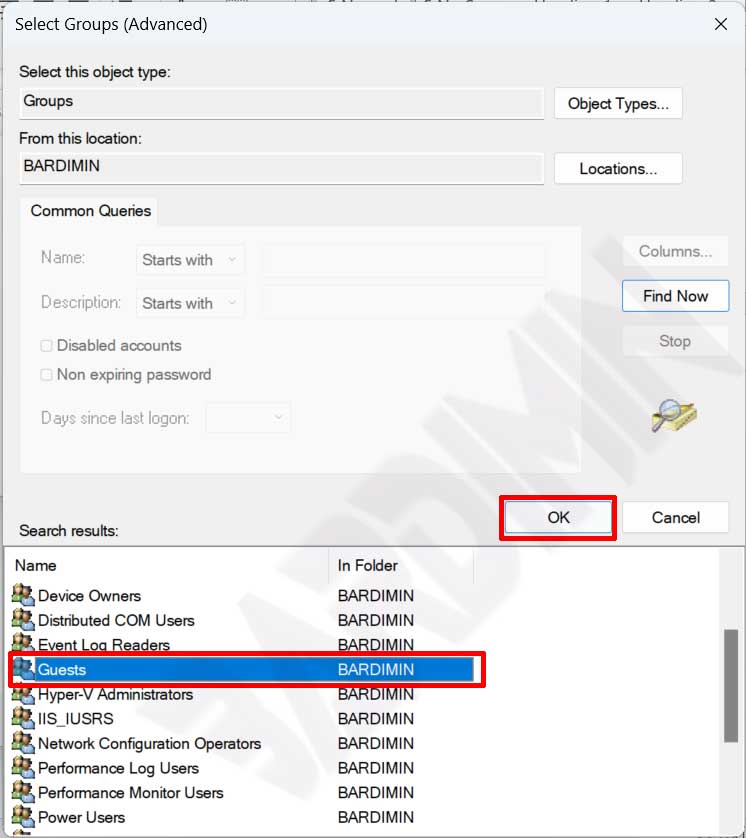
      2. Next, click the “Find Now” button to display all groups. Select the “Guest” group, and click the OK button to add.
      compmgmt. user properties remove guest group
      • TAGS
      • bot
      • Computer
      • Computer Management
      • Guest
      • keyboard
      • Keyboard Shortcuts
      • Microsoft
      • Microsoft Account
      • Mouse
      • Password
      • PC
      • Security
      • settings
      • Windows
      • Windows 11
      Previous articleHow to Export and Import Windows 11 Drivers without Apps
      Next articleIperf2 vs Iperf3 – Network Performance Measurement
      Bardimin
      Manage Consent
      To provide the best experiences, we use technologies like cookies to store and/or access device information. Consenting to these technologies will allow us to process data such as browsing behavior or unique IDs on this site. Not consenting or withdrawing consent, may adversely affect certain features and functions.
      Functional Always active
      The technical storage or access is strictly necessary for the legitimate purpose of enabling the use of a specific service explicitly requested by the subscriber or user, or for the sole purpose of carrying out the transmission of a communication over an electronic communications network.
      Preferences
      The technical storage or access is necessary for the legitimate purpose of storing preferences that are not requested by the subscriber or user.
      Statistics
      The technical storage or access that is used exclusively for statistical purposes. The technical storage or access that is used exclusively for anonymous statistical purposes. Without a subpoena, voluntary compliance on the part of your Internet Service Provider, or additional records from a third party, information stored or retrieved for this purpose alone cannot usually be used to identify you.
      Marketing
      The technical storage or access is required to create user profiles to send advertising, or to track the user on a website or across several websites for similar marketing purposes.
      Manage options Manage services Manage {vendor_count} vendors Read more about these purposes
      View preferences
      {title} {title} {title}
      pixel