Windows 11 makes it possible to create a local user account (offline account) for anyone who will use your PC frequently.
With a local account, you can create your settings and files that will only be available locally on your device for a more personal and secure experience.
A Local Account is an Offline account type and is limited to only one PC. There is no data synchronization to other computers, and for applications that require a login, you must log in separately using a Microsoft Account.
While a Microsoft Account is an online account, which uses your email and password to log in to the computer. It offers more security, provides more recovery options if you forget your PIN or Password, Syncs your themes, apps, and settings to other devices with the same Microsoft account reduces activation complexity, etc.
By default, when you set up a device for the first time, Windows 11 will suggest using a Microsoft Account as it offers many advantages compared to a Local account.
How to add a local account through Windows 11 Settings
- Open “Settings“. You can use keyboard shortcuts (WIN + I).
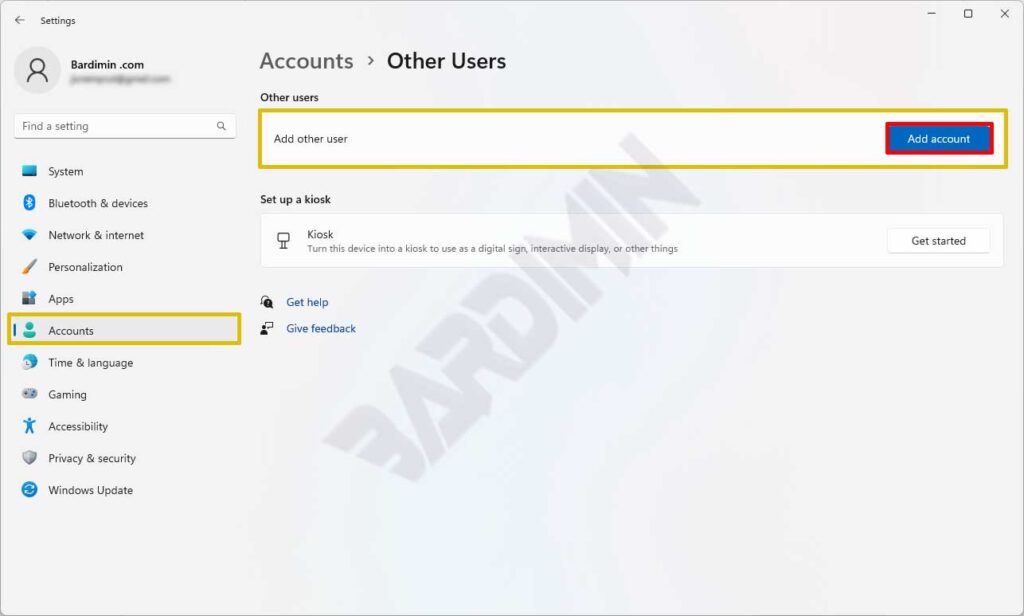
- Navigate to “Accounts > Other users“. Then on “Add other user“, click the “Add account” button.
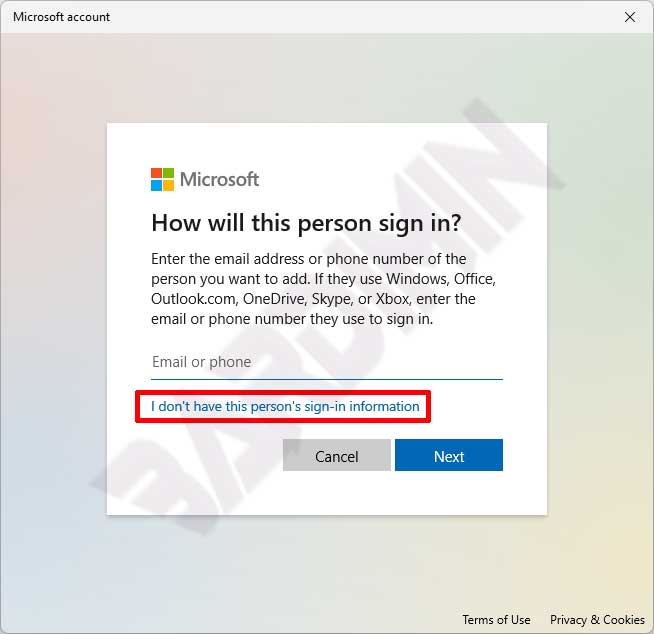
- Next, a popup window will appear, click “I don’t have this person’s sign-in information“.
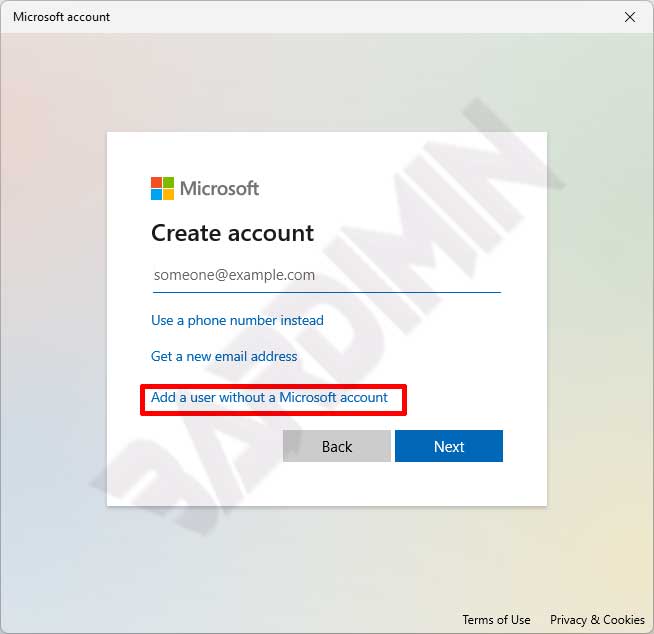
- Then select “Add a user without a Microsoft account.
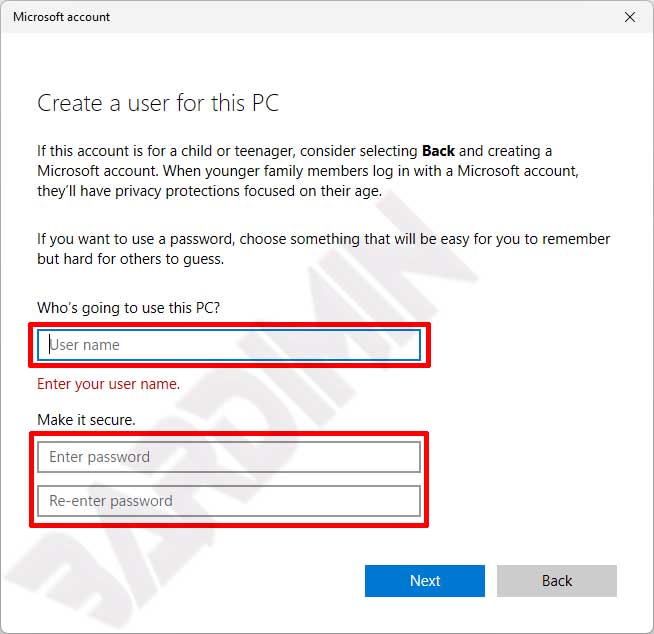
- After that, enter the “Username” and “Password“. And also complete the security questions to recover the password if you forget it. Click the “Next” button to create the account.
- The account will be made of the type “Standard User“.
Changing the access level of a local account through Windows 11 Settings
You can change the access level of a local account through Settings in Windows 11. There are two types of accounts to choose from.
- Administrator: An account for users who need full access to the computer.
- Standard User: An account for users who need to run applications but must be restricted or restricted in administrative access to the computer.
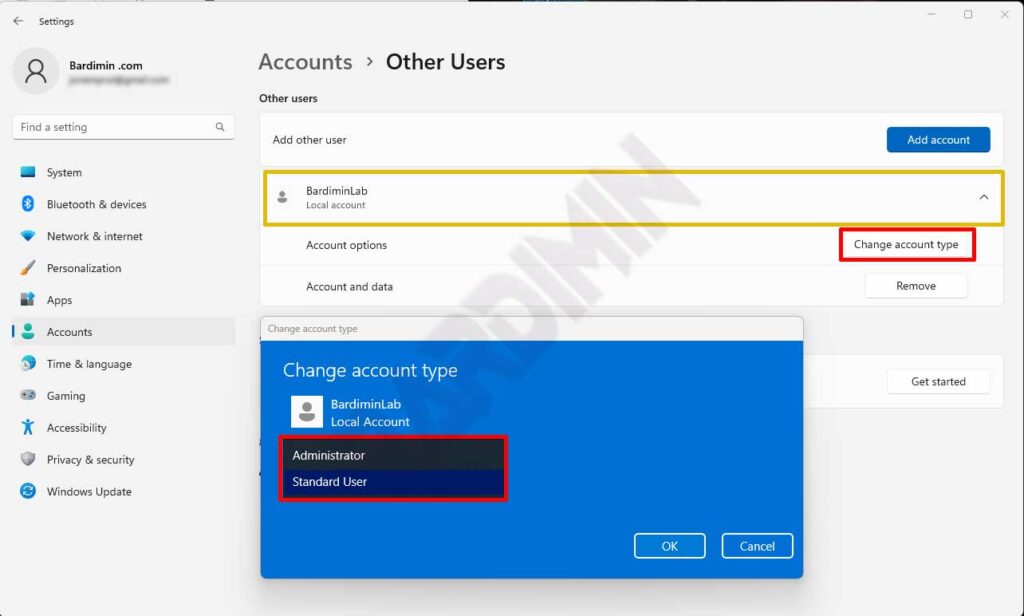
To change the account type, click on the username to expand it and then click the “Change account type” button. Select Administrator or Standart user according to your needs.
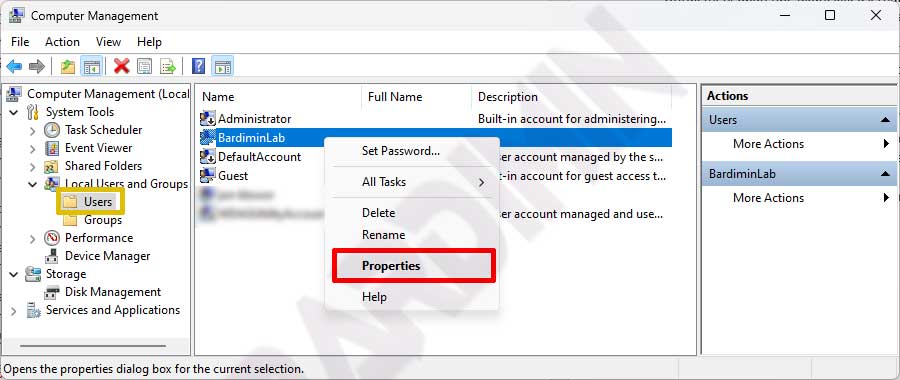
Change the access level of a local account through Windows 11 Computer Management
Through Computer Management, you can determine user access in more detail than through Windows 11 Settings.
- Open “Computer Management“. You can open it by using (WIN + R) and typing “compmgmt.msc” and you can also open it by right-clicking the Start button and selecting “Computer Management”.
- Then navigate to “Local Users and Groups > Users“. In the right panel, select the username you want to change and right-click. Select “Properties“.
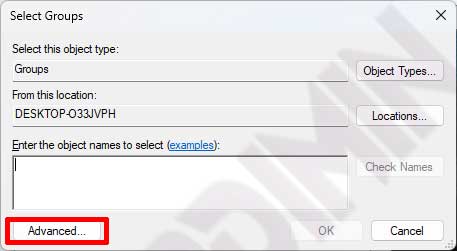
- Next, in the Properties window, select the “Member Of” tab. Click the “Add” button to add access or “Remove” to remove access.

- To add. Click the “Add” button. Then on the popup that appears, click on the “Advanced” button.
- Next, click the “Find Now” button to display all groups. Select the group that matches the access you provide. One username can be a member of several groups. Click OK button to add.
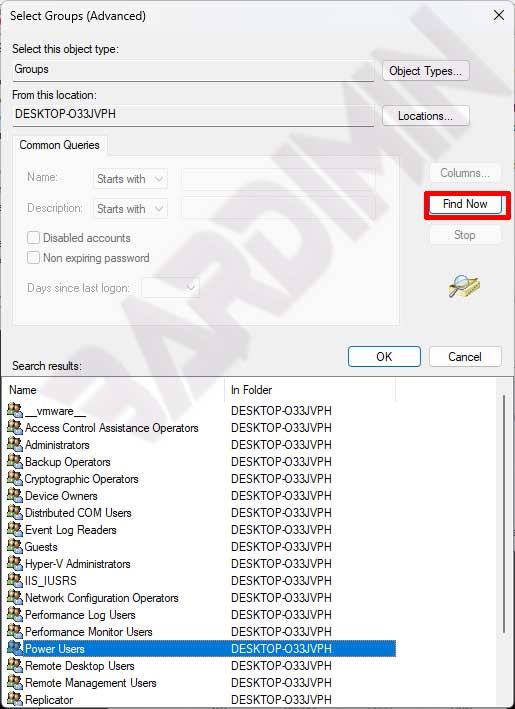
- Repeat step 5 to add another access.
Group List and Access Levels in Windows 11
| Name | Information |
| Access Control Assistance Operators | Members of this group can remotely request authorization attributes and resource permissions on this computer. |
| Administrators | Administrators have complete and unrestricted access to computers/domains |
| Backup Operators | The Backup operator can override security restrictions to back up or restore files only |
| Cryptographic Operators | Members are authorized to perform cryptographic operations. |
| Device Owners | Members of this group can change system-wide settings. |
| Distributed COM Users | Members are allowed to launch, activate, and use Distributed COM objects on this machine. |
| Event Log Readers | Members of this group can read the event log from the local machine |
| Guests | Guests have the same access as members of the Users group by default, except for Guest accounts that are subsequently restricted |
| Hyper-V Administrators | Members of this group have complete and unrestricted access to all the features of Hyper-V. |
| IIS_IUSRS | Built-in groups used by Internet Information Services. |
| Network Configuration Operators | Members in this group can have multiple administrative rights to manage network feature configuration |
| Performance Log Users | Members of this group can schedule performance counter logging, enable tracking providers, and collect event traces both locally and through remote access to these computers |
| Performance Monitor Users | Members of this group can access performance counter data locally and remotely |
| Power Users | Power User is included for backward compatibility and has limited administrative power |
| Remote Desktop Users | Members of this group are granted the right to enter remotely |
| Remote Management Users | Members of this group can access WMI resources through management protocols (such as WS-Management through the Windows Remote Management service). This only applies to WMI namespaces that grant access to users. |
| Replicator | Supports file replication within a domain |
| System Managed Accounts Group | The members of this group are managed by the system. |
| Users | Users are prevented from making system changes accidentally or intentionally and can run most applications |
| Windows Admin Center CredSSP Administrators | Users allowed for Windows Admin Center CredSSP operations |