Facebook Linkedin Medium Pinterest Twitter
  • Windows
  • Hardware
  • Networking
  • Database
  • Security
  • Software
  • Android
logo bardiminBardiminThe Beauty of Sharing Knowledge
  • Windows
  • Hardware
  • Networking
  • Database
  • Security
  • Software
  • Android
logo bardiminBardiminThe Beauty of Sharing Knowledge
Facebook
Linkedin
Medium
Pinterest
Twitter
  • Windows
  • Hardware
  • Networking
  • Database
  • Security
  • Software
  • Android
More
    • Windows
    • Hardware
    • Networking
    • Database
    • Security
    • Software
    • Android
    More
      Home Windows Tips and Tricks
      • Windows
      • Tips and Tricks

      How To Connect Remote Desktop Without Password In Windows 11

      October 20, 2022
      138
      gpedit Limit local account

      A Remote Desktop is a software or operating system capability that allows a personal computer desktop environment to be run remotely from one system when displayed on different client devices.

      To access and take advantage of the Remote Desktop functionality of the Windows 11 operating system, Windows PC users must have a password. The default settings of the Remote Desktop usually prohibit password less access.

      When you try to establish a Remote Desktop connection to a remote Windows-based machine and log in remotely to the machine, the logon may fail if you do not enter a password and the Remote Desktop client will display an error message because of a problem with the Windows authentication.

      Does Remote Desktop require a password to operate? Yes, that is the answer to this question. However, by changing some parameters to enable a blank password, you will connect remotely without a password.

      How to use Windows 11 Remote Desktop without a password

      Setting the default security policy in Windows OS prevents password less user access, therefore if you do not have a password, Remote Desktop will not work.

      On Windows 11 PC, you can use Remote Desktop without a password by configuring it in one of the following ways:

      1. Local Group Policy
      2. Local Security Policy
      3. Windows Registry

      Remote Desktop Configuration via Local Group Policy

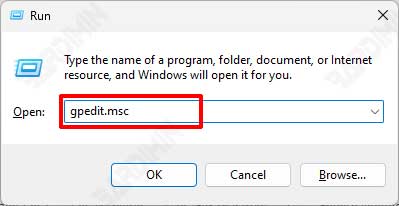
      1. Go to “Local Group Policy“. You can open it by using the keyboard shortcut (WIN + R) to open the “Run” dialog box. Then type “gpedit.msc” and click the OK button.
      open gpedit 1
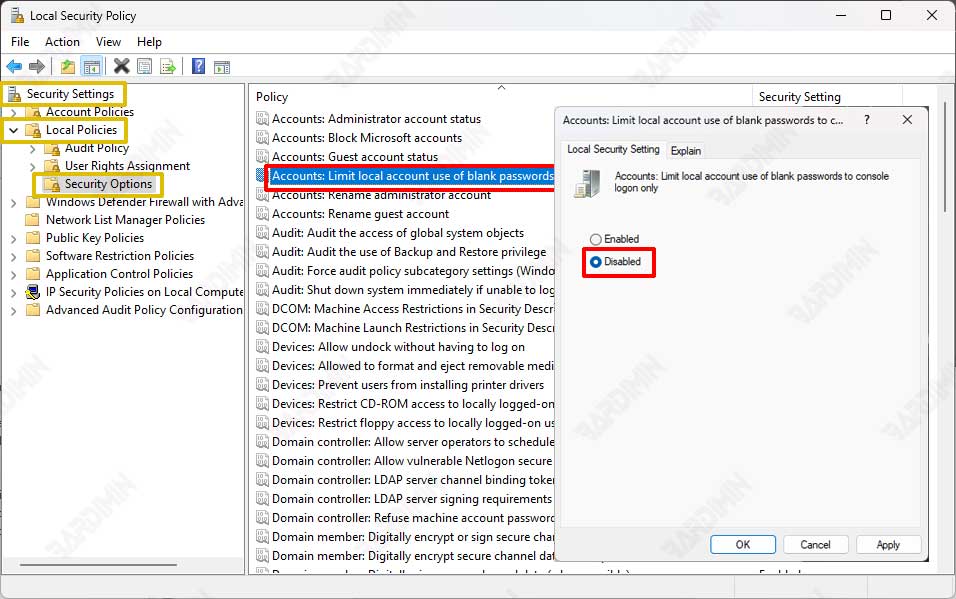
      1. Next, navigate to “Local Computer Policy >> Computer Configuration >> Windows Settings >> Security Settings >> Local Policies >> Security Options.
      gpedit Limit local account
      1. Then on the right panel, double-click on “Accounts: Limit local account use of blank passwords to console logon only“.
      2. Select “Disabled” and click the OK button to save it.

      Remote Desktop Configuration via Local Security Policy

      1. Open the “Local Security Policy“. You can open it by using the keyboard shortcut (WIN + R) to open the “Run” dialog box. Then type “secpol.msc” and click the OK button.
      2. Next, navigate to “Security Settings >> Local Policies >> Security Options.
      secpol Limit local account
      1. Then on the right panel, double-click on “Accounts: Limit local account use of blank passwords to console logon only“.
      2. Select “Disabled” and click the OK button to save it.
      Other Interesting Articles
      • How to Solve Remote Desktop Issues on Windows 11
      • How to Disable Security Questions for Local Accounts in Windows 11
      • How to Create a Local Account in Windows 11

      Remote Desktop Configuration via Windows Registry

      1. Open the “Windows Registry“. You can open it by using the keyboard shortcut (WIN + R) to open the “Run” dialog box. Then type “regedit” and click the OK button.
      2. Next, navigate to “HKEY_LOCAL_MACHINE\SYSTEM\CurrentControlSet\Control\Lsa“.
      regedit blank password
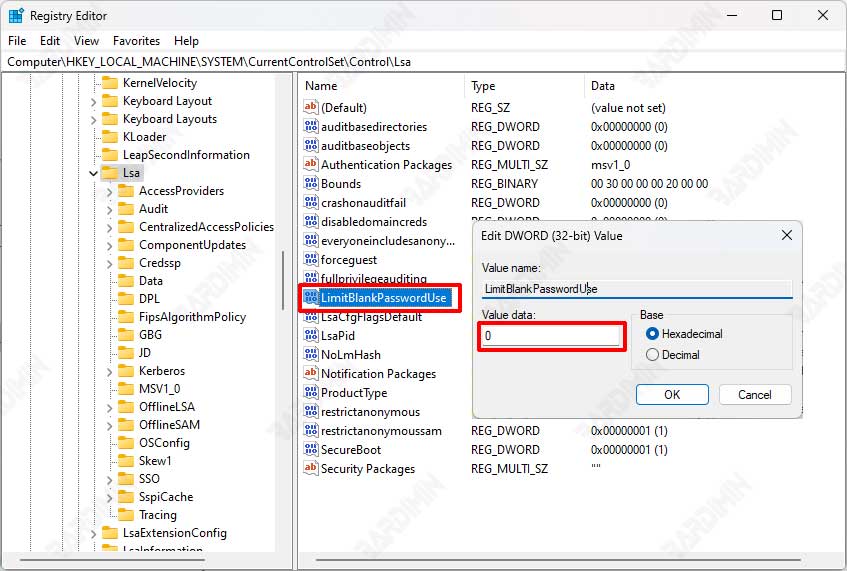
      1. Then on the right-hand panel, double-click on “LimitBlankPasswordUse“.
      2. Change the Value of “Value data:” to the number “0” and climax the OK button to save it.
      3. Restart your computer.
      • TAGS
      • bot
      • Computer
      • desktop
      • gpedit.msc
      • keyboard
      • Keyboard Shortcuts
      • Local Account
      • operating system
      • Password
      • PC
      • plug in
      • regedit
      • registry
      • Remote Desktop
      • Security
      • settings
      • Software
      • Windows
      • Windows 11
      Previous articleEasy Ways to Enable and Disable “Memory Compression” to Improve Windows 11 Performance
      Next articleEasy Ways to Lock Windows 11 PC Automatically After Inactivity
      Bardimin
      Manage Consent
      To provide the best experiences, we use technologies like cookies to store and/or access device information. Consenting to these technologies will allow us to process data such as browsing behavior or unique IDs on this site. Not consenting or withdrawing consent, may adversely affect certain features and functions.
      Functional Always active
      The technical storage or access is strictly necessary for the legitimate purpose of enabling the use of a specific service explicitly requested by the subscriber or user, or for the sole purpose of carrying out the transmission of a communication over an electronic communications network.
      Preferences
      The technical storage or access is necessary for the legitimate purpose of storing preferences that are not requested by the subscriber or user.
      Statistics
      The technical storage or access that is used exclusively for statistical purposes. The technical storage or access that is used exclusively for anonymous statistical purposes. Without a subpoena, voluntary compliance on the part of your Internet Service Provider, or additional records from a third party, information stored or retrieved for this purpose alone cannot usually be used to identify you.
      Marketing
      The technical storage or access is required to create user profiles to send advertising, or to track the user on a website or across several websites for similar marketing purposes.
      Manage options Manage services Manage {vendor_count} vendors Read more about these purposes
      View preferences
      {title} {title} {title}
      pixel