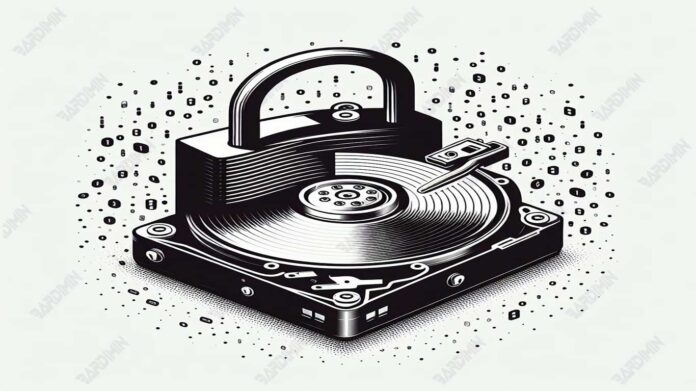
In today’s digital age, hard drives and USB flash drives are important containers for our wealth of information. However, what happens if the storage device we rely on is suddenly locked by Write Protection?
This situation not only hinders productivity but can also raise concerns about the security of our data. Write protection or write protection is often a frustrating barrier for users because it limits the ability to edit or delete files from their storage devices.
This article is designed as a handy guide that will take you through the step-by-step process for identifying and removing Write Protection. By following the instructions we presented, you will be able to restore full access to your hard drive or USB flash drive, allowing again the use of your storage device without restrictions. We will discuss effective and reliable solutions, ensuring that you can address these issues with confidence and maintain the integrity of your data.
What is Write Protection?
Write Protection is a security mechanism applied to storage media such as hard drives, USB flash drives, or SD cards to prevent data changes. This protection prevents users from the ability to modify or delete existing files and add new files to protected storage media.
Write Protection is often implemented for security reasons, to maintain data integrity from viruses or malware, and to prevent accidental changes by users. In a corporate context, this can be used to ensure sensitive data is not altered or deleted without proper authorization.
For users, Write Protection can be prohibitive, especially if implemented without their knowledge or if they have no way to remove it. This can hinder productivity, limit access to data, and make file management difficult. However, in situations where Write Protection is applied correctly, it can serve as an additional layer of security to protect data from unwanted changes.
Common Causes of Write-Protected Hard Drives
User Error
- User Error is one of the common causes of write protection on hard drives. Some errors that often occur include:
- Incorrect Settings: Users may have inadvertently enabled write protection through operating system settings or disk management software.
- Use of Physical Buttons: Some storage devices have a physical button to enable write protection, which may be accidentally moved to the locked position.
- Incorrect Formatting: Incorrect formatting or incompatibility with the operating system can result in the drive becoming write-protected.
Virus or Malware Protection
- Virus or Malware protection can also cause a hard drive to become write-protected. These include:
- Malware Infection: Some malware is designed to enable write protection in an effort to protect itself from deletion.
- Antivirus Protection: Some antivirus programs may lock the drive as a precaution against detected threats.
Physical Damage to the Drive
- Physical Damage to the Drive could be the reason why the drive becomes write-protected. Causes include:
- Mechanical Damage: Damaged or worn internal components can result in the drive not functioning properly, including enabling write protection.
- Poor Connectivity: Faulty connectors or poorly connected cables can cause the device to not be detected properly and set as read-only.
Incorrect Registry Settings
- Incorrect Registry Settings are often the cause of hard drives becoming write-protected, especially in Windows operating systems. Causes include:
- Configuration Error: Improper modification of the registry by the user or software can enable write protection.
- Security Policy: System administration or company policy may set the registry to enable write protection for data security.
How to Check Write Protection Status
Using Windows File Explorer
Windows File Explorer is a simple and easy-to-use tool to check the write protection status on your drive.
- Open Windows File Explorer.
- Right-click on the drive you want to check and select ‘Properties’.
- Under the ‘General’ tab, look for the ‘Attributes’ section and check if the option ‘Read-only’ aktif.
Checking BIOS/UEFI Settings
BIOS/UEFI sometimes have settings for write protection, especially for internal drives.
- Restart your computer and enter the BIOS/UEFI by pressing the appropriate key (usually F2, F10, DEL, or ESC) while booting.
- Navigate to the Security or Boot menu and look for options related to Write Protection.
- Make sure there are no settings that enable Write Protection on your drive.
Using Command Prompt
Command Prompt allows you to check the write protection status with the diskpart command.
- Open Command Prompt as an administrator.
- Type diskpart and press Enter.
- After logging in to the Diskpart, type list disk and press Enter to display all disks.
- Type select disk X (replace X with the relevant disk number) and press Enter.
- Type attributes disk and press Enter. It will display the status of atribut disk, including whether the disk is write-protected.
Effective Methods of Removing Write Protection
Using Diskpart
Diskpart is a built-in Windows tool that you can use to manage disks and partitions on your computer.
Detailed Steps Using Diskpart
- Open Command Prompt as an administrator.
- Type diskpart and press Enter.
- Enter list disk to display all available disks.
- Select the desired disk with select disk X (replace X with the relevant disk number).
- Type attributes disk clear readonly to remove the write-protected status.
Diskpart Command Example
diskpart
list disk
select disk 1
attributes disk clear readonly
Using Registry Editor
Registry Editor allows you to change registry settings that could affect the Write Protection status of the drive.
Registry Editing Guide
- Open Registry Editor by typing regedit in the Windows search box and pressing Enter.
- Navigate to HKEY_LOCAL_MACHINE\SYSTEM\CurrentControlSet\Control\StorageDevicePolicies.
- Find the WriteProtect value and change the data to 0.
Edit Registry Case Examples
Path: HKEY_LOCAL_MACHINE\SYSTEM\CurrentControlSet\Control\StorageDevicePolicies
Value: WriteProtect
Data: 0
Using Group Policy Editor
Group Policy Editor allows you to set group policies that can control Write Protection on the drive.
Steps to Use Group Policy Editor
- Open Group Policy Editor by typing gpedit.msc in the Windows search box and pressing Enter.
- Navigate to Computer Configuration\Administrative Templates\System\Removable Storage Access.
- Find and change the All Removable Storage classes: Deny all access setting to Disabled.
Group Policy Editor Use Case Study
Path: Computer Configuration\Administrative Templates\System\Removable Storage Access
Setting: All Removable Storage classes: Deny all access
State: Disabled
Using Third-Party Software
Some third-party software offers solutions to remove Write Protection with a more user-friendly interface.
Best Software Recommendations
- EaseUS Partition Master: This software provides features to manage partitions and remove Write Protection.
- AOMEI Partition Assistant: This tool also allows Write Protection deletion and efficient partition management.
EaseUS Partition Master Software Usage Guide
- Download and install EaseUS Partition Master.
- Open the app and select the drive write protected.
- Right-click on the drive and select ‘Check partition’.
- Follow the instructions to scan and fix problems with the drive.
Additional Solutions If Hard Drive Still Write-Protected
Use Safe Mode
- Restart your computer and press F8 (or Shift+F8 on some systems) to enter Safe Mode.
- In Safe Mode, Windows will run with a minimum set of necessary drivers and services, which can facilitate the removal of Write Protection.
Checking and Fixing Bad Sectors
- Open Command Prompt as an administrator.
- Type chkdsk E: /f /r /x (replace E with the relevant drive letter) and press Enter.
- This command checks for and fixes bad sectors and other file system errors that may be causing Write Protection.
Contact Technical Support
If all of the above methods do not work, there may be more complex problems that cannot be solved with standard solutions. In this case:
- Contact your hard drive manufacturer’s technical support.
- Prepare information about the model of the hard drive and a description of the problem you are experiencing.
- Professional technical support can provide further instructions or solutions tailored to your situation.
Conclusion
Write Protection on hard drives and USB flash drives can be a serious hindrance in data management. However, with a proper understanding of the causes and available solutions, you can address this problem effectively. From the use of built-in Windows tools like Diskpart and Registry Editor, to third-party software solutions like EaseUS Partition Master, there are various ways to remove Write Protection.
It is important to remember that prevention is always better than treatment. Therefore, preventive measures such as regular virus scanning, periodic data backups, and proper use of physical protection should always be a priority. By following this guide and taking advantage of the tips provided, you can ensure that your storage device remains safe and free from unwanted restrictions.