The motherboard is an important component in computers. All hardware such as processors, memory, graphics cards, and storage are connected through the motherboard. This component serves as the main link that ensures that communication between hardware parts runs well so that the computer can operate optimally.
However, troubleshooting problems with motherboards is often difficult. This is because the motherboard combines various components in a single circuit board. Damage to any one component can affect the entire system.
In addition, problems can appear without obvious symptoms, requiring an in-depth and often complicated diagnosis process. Therefore, it is important for computer technicians and users to understand how to systematically troubleshoot problems with the motherboard.
The Role of POST in Motherboard Troubleshooting
POST (Power-On Self-Test) is a series of checks performed by a computer when it is turned on. POST aims to ensure that all hardware components, such as the CPU, RAM, and disk drive, are functioning properly before the BIOS loads the operating system. If any problem is detected, POST will provide a signal through a beep, number code, or on-screen message.
Each motherboard may have different error codes depending on the BIOS used (such as AMI BIOS, AWARD BIOS, or PHOENIX BIOS). Therefore, finding out what the code means through documentation or online sources is important. This code usually indicates a type of problem, such as an error in the RAM or CPU.
If multiple error codes appear together, it is important to handle them in the order in which they appear. Start with the code that first appears, as this often indicates a major problem. Addressing one problem at a time can help determine if other problems still exist after the fix.
Motherboard Troubleshooting Steps
1. Check the Power on the Motherboard
An important first step in troubleshooting is to make sure the motherboard is getting power. Here’s how to check the power on the motherboard:
Check the Fans in the Power Supply and CPU
When the computer is turned on, see if the fans in the power supply and CPU are spinning. Otherwise, this could indicate that the motherboard is not getting power from the power supply.
Check the Voltage from the Power Supply to the Motherboard
Make sure all power cables are properly plugged in, including the 24-pin connector for the motherboard and the 4/8-pin connector for the CPU. If the cables are not properly connected, the motherboard will not get the power it needs.
You can use a multimeter to measure the voltage from the power supply and make sure that the right voltage (such as 5V and 12V) is available to the motherboard.
2. Check BIOS Settings
BIOS settings are essential to ensure that the computer runs properly. The BIOS (Basic Input Output System) sets the basic configuration of the hardware and the boot order in which the computer is turned on.
Errors in BIOS settings can cause problems such as the computer won’t boot, the hardware won’t be detected, or the operating system won’t load. Therefore, checking the accuracy of BIOS settings is an important step in troubleshooting.
How to Check or Reset BIOS Settings
1. Access BIOS Settings:
To enter the BIOS, restart your computer and press the appropriate button (such as F2, F10, DEL, or ESC) when the manufacturer’s logo appears. The buttons used may differ depending on the motherboard brand.
2. Check Settings:
Once in the BIOS menu, check all the important settings such as boot order, CPU settings, and RAM configuration. Make sure all hardware is detected correctly.
Also, check the date and time settings of the system to ensure accuracy.
3. Reset BIOS Settings:
If there is an error or you want to restore the settings to factory defaults, look for the “Load Setup Defaults” or “Reset to Default” option in the BIOS menu. Select this option and confirm to reset all settings.
After resetting, be sure to save the changes before exiting the BIOS.
4. Update BIOS (If Required):
If the problem persists, consider updating the BIOS to the latest version from the motherboard manufacturer’s website. This update can fix bugs and improve hardware compatibility.
3. Check for Overheating
Overheating is a common problem that can make the motherboard and other components unstable or even die suddenly. Excessive heat is usually caused by poor ventilation, accumulated dust, or a non-functioning cooler.
Signs of Overheating on the Motherboard
- The computer suddenly shuts down or shuts down automatically when in use.
- Performance becomes slow or laggy, especially when running heavy applications.
- The loud fan sound indicates that the fan is trying hard to cool the system.
- The temperature of the case or component increases, it feels hot to the touch.
- A high-temperature warning message appears on the screen (on some systems).
If overheating is detected, take the following steps:
- Turn off the computer immediately to avoid further damage due to high temperatures.
- Allow the computer to turn off for a few minutes to allow the internal components to cool down.
- If you can, open the computer case to improve air circulation and speed up cooling.
- Once the system has cooled down enough, turn on the computer without closing the case. This allows you to monitor the temperature of the components and ensure that the cooling system is functioning properly.
- Pay attention to whether the fan is spinning properly and if any signs of overheating appear again.
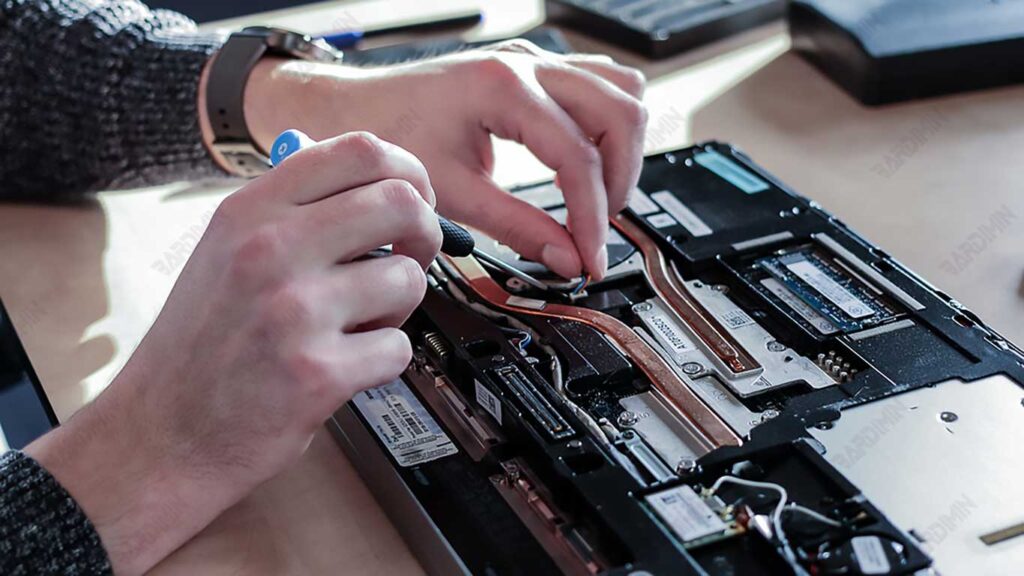
4. Check the Hardware
Reseating the CPU and memory chip is an important step in troubleshooting that can help resolve various issues during boot and performance. This process involves removing and reinstalling components to ensure the connections between the CPU, RAM, and motherboard are working properly.
1. CPU Reseating :
- Turn off the computer and unplug all power cords.
- Carefully remove the CPU heatsink or cooler.
- Remove the CPU from its socket, check the pins for damage or debris, and then carefully reinstall them.
- Apply a new thermal paste if needed before reinstalling the heatsink.
2. Memory Chip Reseating :
- Remove all RAM modules from their slots.
- Check the RAM module for physical damage or debris to the connectors.
- Reinstall the RAM modules one by one, making sure they are properly seated in the appropriate slots.
The reseating process can fix problems caused by poor contact or dust blocking the connection. Many users report that after reseating the CPU or RAM, their computer starts functioning normally again.
Removing Unnecessary Adapters and Attempting a Reboot
If the problem persists after reseating, the next step is to remove any unnecessary adapters or hardware.
1. Remove the Adapter:
- Unplug any additional devices such as graphics cards, sound cards, or USB devices that are not essential for the boot process.
- Leave only the basic components: motherboard, CPU, RAM module, and power supply.
2. Try Rebooting:
- With this minimal configuration, try turning on the computer.
- If the computer boots up successfully, re-add the devices one at a time to identify which components are causing the problem.
This step helps isolate the problem and ensure that no additional devices are interfering with the boot process.
5. Power Supply and Grounding Test
The first step to testing the power supply (PSU) is to make sure that the problem is not coming from the power source. To do this, connect your computer to another outlet:
- Turn off the computer and unplug the power cord from the power source.
- Connect the power cord to a different outlet to ensure the previous outlet is not problematic.
- Try turning on the computer and see if there are any changes in the boot process or other issues.
This step helps to know if there is a problem with the power supply from the outlet used previously.
Make Sure the Motherboard Doesn’t Have a Short Circuit with the Case
Grounding or short-circuit issues can occur if the motherboard is in direct contact with the case. Here are the steps to check it:
- Make sure the computer is off and unplug all power cords.
- Carefully remove the motherboard from the case. Check if there are screws or other objects stuck between the motherboard and the case that could cause a short circuit.
- Make sure the motherboard is installed on the correct standoff so that it does not come into direct contact with the case.
- After making sure there are no potential short circuits, try turning on the motherboard without the case to see if the problem still exists. This can help to know if the case is causing the problem.
By performing these steps, you can ensure that the PSU is functioning properly and that the motherboard is not experiencing grounding issues that could interfere with the system.
6. Check the CMOS Battery
CMOS batteries (Complementary Metal-Oxide-Semiconductor) are essential for computers, especially in storing BIOS settings. The main task of this battery is to provide power so that the BIOS settings remain in place even when the computer is turned off. Without a CMOS battery, all configurations in the BIOS, such as boot order and hardware settings, will be lost every time the computer is turned off. In addition, this battery also keeps the time and date of the system accurate, even when there is no electricity.
How to Check and Replace Batteries If Necessary
1. Checking the Battery Status:
- If your computer frequently experiences problems with booting up or an error message appears related to the BIOS, this could be a sign that the CMOS battery is low or dead.
- If the system time and date always return to the initial setting after turning off, this also indicates that the battery needs to be checked.
2. Replacing the CMOS Battery:
- Unplug all power cords and make sure the computer is off.
- Remove the computer case to access the motherboard.
- Look for a small round battery (usually type CR2032) on the motherboard.
- Carefully remove the battery from its socket. Remember how to install it so that you can install the new battery correctly.
- Replace it with the same new battery (CR2032) and put it back in place.
- After replacing the battery, close the case and reconnect the power cord. Turn on your computer and check that the BIOS settings are well saved.
7. Use Motherboard Diagnostic Indicators
Many modern motherboards are equipped with diagnostic LEDs that help in the troubleshooting process. These indicators, such as the Q-LED on ASUS motherboards, provide visual information about the status of key components when the computer is powered on. Here’s how to use diagnostic LEDs:
1. Pay attention to the LED light that turns on after the computer is turned on.
- CPU LED: If it is on constantly, this could mean that there is no CPU or the CPU is damaged.
- DRAM LED: If it is on, it could mean that there is no memory or memory is problematic.
- VGA LED: If it is on, this indicates there is a problem with the graphics card.
- BOOT LED: If it is on, it could mean that no boot device is detected.
2. Follow-up Based on Indicators.
Once you know the problematic component through the LED, perform troubleshooting steps as instructed in the motherboard documentation or the manufacturer’s website.
Refer to the Motherboard Documentation for Error Code Solutions
Each motherboard manufacturer has a different system of error codes and instructions. Therefore, it is important to refer to the specific documentation of your motherboard:
1. Check the User Manual:
The user manual usually includes information about the diagnostic LEDs and the meaning of each code or light that lights up.
2. Manufacturer’s Website:
Visit your motherboard manufacturer’s official website to find more information regarding your specific model. Look for the FAQ or technical support section to find solutions regarding the error codes indicated by the LEDs.
3. Use Additional Diagnostic Tools:
If the motherboard does not have a built-in indicator, you can use the POST test card installed in the PCIe slot to display error codes and aid in the diagnosis of the problem.
4. Safety Tips in Handling the Motherboard
The importance of antistatic measures when installing or removing a motherboard.
Use an antistatic mat or antistatic bag.