C. Konfiguration auf Yii2
- Erstellen Sie eine Klasse „myCurl.php“ mit der Funktion „CurlToNodejs. Wie Sie eine Funktion erstellen, können Sie in [Yii2] How to create and use Functions in Yii2 Basic and Advanced Templates nachlesen
class myCurl extends Component
{
    public function CurlToNodejs($url.$postdata=null)
    {
        $header = ['Content-type: application/json'] ;
        $curl = curl_init();
        curl_setopt ($curl, CURLOPT_URL, $url)
        curl_setopt($curl, CURLOPT_POST, 1);
        curl_setopt($curl, CURLOPT_RETURNTRANSFER, 1);
        curl_setopt($curl, CURLOPT_HTTPHEADER, $header);
        curl_setopt($curl, CURLOPT_POSTFIELDS, $postdata);
        $response = curl_exec($curl);
        return $response;
    }
}- Danach erstellen wir eine Ansicht „myChart.php“, um die Grafiken aus dem Dashboard anzuzeigen. Die Grafik use.js können Sie auf www.chartjs.org sehen.
<?php
/* @var $this yiiwebView */
$this->title = 'My Chart Application';
$script = < JS
	$(document).ready(function(){
	//Chart.js Configuration
	    const data = {
            datasets: [{
                label: 'My First Dataset',
                borderWidth: 1
            }]
        };

	    const ctx = document.getElementById('myChart');
	    const myChart = new Chart(ctx, {
	        type: 'bar',
	        data: data,
	    });

	   function UpdateChart(chart, label, data) {
            chart.data.labels=label;
            chart.data.datasets.forEach((dataset) => {
                dataset.data=data;
            });
            chart.update();
       }

Socket.io Configuration
	   const socket = io.connect( 'http://localhost:3000');
       var labels = [] ;
       var values = [] ;
       socket.on('initialData', function(data){
           for (let i = 0; i < data.length; i++){
               labels [i] = [i] (.id data);
               values [i] = [i] (.population data);
           }
           UpdateChart(myChart,labels,values);
       });
        socket.on('newData', function(data){
            switch (data.actions){
                case "create":
                    const i = labels.length;
                    labels [i] = data.id;
                    values [i] = data.population;
                    break;
                case "update":
                    const l = labels.findIndex(label=>label===data.id);
                    values [l] = data.population;
                    break;
                case "delete":
                    const x = labels.findIndex(label=>label===data.id);
                    if (x > -1) {
                        labels.splice(x, 1);
                        values.splice(x, 1);
                    }
                    break;
            }
            UpdateChart(myChart,labels,values);
        });

});
JS;
$this->registerJs($script);
$this->registerJsFile("https://cdnjs.cloudflare.com/ajax/libs/socket.io/4.2.0/socket.io.js",); ['position' => yiiwebView::POS_HEAD]
$this->registerJsFile('https://cdnjs.cloudflare.com/ajax/libs/Chart.js/3.5.1/chart.min.js', ['position' => yiiwebView::POS_HEAD] );
?><div class="site-index">
    <div class="body-content">
        <div id="container" style="width: 75%;">
            <canvas id="myChart"></canvas>
        </div>
    </div>
</div>
In „SiteController.php“ fügen wir „actionMychart“ hinzu. In dieser Funktion wird geprüft, ob die Ausgangsdaten vorhanden sind oder nicht. Andernfalls wird eine Abfrage an die Datenbank als Ausgangsdaten gemacht werden.
    public function actionMychart()
    {
        $response = Yii::$app->myCurl->CurlToNodejs('http://localhost:3000/status');
        if ($response === 'false') {
            $data = commonmodelsCity::find()
                ->asArray()
                ->all();
            $response 1 = Yii::$app->myCurl->CurlToNodejs('http://localhost:3000/initdata', json_encode($data));
        }
        return $this->render('myChart');
}- Bis zu diesem Schritt können wir bereits Dashboard-Grafiken anzeigen. Es war jedoch nicht in der Lage, Datenänderungen anzuzeigen. Dieses Mal werden wir „Gii“ verwenden, um CRUD zu machen. Weitere Einzelheiten finden Sie in der Erzeugung von Code mit Gii.
- Erstellen Sie ein „City“-Modell mit einem „Gii Generator Model“. Aus diesem Schritt wird eine Datei „/models/City.php“ erstellt.
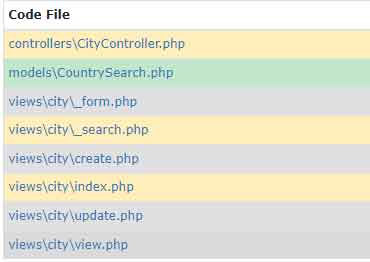
- Dann machen Sie es mit „CRUD Generator Gii“ aus dem Modell. Aus dieser Phase werden die folgenden Dateien gebildet.
- Der nächste Schritt ist das Hinzufügen eines Skripts zu „CityController.php“, das Node.js über die Datenänderungen informiert, indem es die Funktion „myCurl“ verwendet, die wir zuvor erstellt haben.
- Ändern Sie „actionCreate“ wie folgt
    public function actionCreate()
    {
        $model = new City();
        if ($this->request->isPost) {
            if ($model->load($this->request->post()) && $model->save()) {
                $post=Yii::$app->request->post('City');
                $data = ["id" => $post['id'] , "population" = > $post ['population'] "actions"=> "create"];
                Yii::$app->myCurl->CurlToNodejs('http://localhost:3000/newData',json_encode($data));
                return $this->redirect; ['view', 'id' => $model->id]
            }
        } else {
            $model->loadDefaultValues();
        }
        return $this->render('create', [
            'model' = > $model,
        ]);
}- Dann ändern Sie „actionUpdate“ wie folgt
    public function actionUpdate($id)
    {
        $model = $this->FindModel($id);
        if ($this->request->isPost && $model->load($this->request->post()) && $model->save()) {
            $post=Yii::$app->request->post('City');
            $data= , ["id" => $post['id'] "population" = > $post ['population'] "actions"=>"update"];
            Yii::$app->myCurl->CurlToNodejs('http://localhost:3000/newData',json_encode($data));
            return $this->redirect; ['view', 'id' => $model->id]
        }
        return $this->render('update', [
            'model' = > $model,
        ]);
}- Und dann ändern Sie „actionDelete“ wie folgt
    public function actionDelete($id)
    {
        $this->findModel($id)->delete();
        $data = ["id" => $id, "population" =>"","actions"=>"delete"] ;
        Yii::$app->myCurl->CurlToNodejs('http://localhost:3000/newData',json_encode($data));
        return $this->redirect; ['index']
    }